Welcome to our blog post on simple cake decorating ideas. In this article, we will be exploring the wonderful world of cake decoration and sharing some easy yet impressive techniques that anyone can try. Whether you’re a beginner looking to learn the basics or an experienced baker wanting to expand your repertoire, we have something for everyone.
Cake decoration is an essential element in making any baked creation truly special. It adds flair, creativity, and personality to your cakes, making them stand out from the crowd. The best part is that you don’t need to be a professional pastry chef or have extensive artistic skills to create beautiful designs. With a few simple tricks and techniques, you can transform an ordinary cake into a work of art.
Throughout this article, we will focus on simplicity – simple tools, ingredients, and techniques that anyone can master. We believe that cake decorating should be accessible to all, regardless of skill level or experience. From basic piping techniques to using edible decorations and working with fondant, we will guide you through each step with clear instructions and helpful visual aids.
Join us as we embark on this exciting journey into the art of simple cake decorating ideas. Whether you’re planning a birthday party, holiday gathering, or just want to impress your friends and family with your baking skills, we are here to inspire and guide you every step of the way. So let’s get started and discover how easy it can be to create stunning cakes that not only taste delicious but also look absolutely amazing.
Tools of the Trade
When it comes to cake decorating, having the right tools can make all the difference. Here are some essential resources that every aspiring cake decorator should have in their toolkit:
- Cake Turntable: A cake turntable is a rotating stand that allows you to easily access all sides of a cake while decorating. It provides stability and precision, enabling you to achieve smooth icing and precise piping.
- Piping Bags and Tips: Piping bags are essential for creating intricate designs on cakes. They come in different sizes and materials, such as disposable plastic or reusable cloth. Paired with various tips, these bags allow you to create different patterns and textures on your cakes.
- Spatulas: Offset spatulas are invaluable when it comes to spreading icing or frosting smoothly on your cake. They help create a clean finish without leaving behind any unsightly marks or uneven surfaces.
- Bench Scraper: A bench scraper is a versatile tool that helps achieve sharp edges and straight sides on your cakes. It is useful for smoothing buttercream or ganache around the sides of the cake.
- Palette Knife: A palette knife is perfect for applying and smoothing out buttercream or ganache on your cakes. It also comes in handy when working with fondant, allowing you to lift and position decorations with ease.
Now that you know about the essential tools, it’s time to start building your collection. These resources can be found at specialty baking stores, craft stores, or even online retailers like Amazon or dedicated baking websites.
Investing in good quality tools will not only make your cake decorating process easier but will also ensure professional-looking results. So gather these essentials and get ready to take your cake decorating skills to the next level.
Beginner-Friendly Techniques
Cake decorating may seem like an intricate art form reserved for professionals, but with some beginner-friendly techniques, anyone can achieve beautiful results. In this section, we will explore easy techniques that will help you build a strong foundation in cake decorating. Whether you’re a novice or have some experience, these techniques will provide you with the skills and confidence to create stunning cakes.
One of the simplest techniques for beginners is the crumb coat. A crumb coat is a thin layer of icing applied to the cake to seal in any loose crumbs before applying the final layer of frosting. To achieve a smooth finish, start by applying a thin layer of buttercream icing to the entire cake using an offset spatula.
Once applied, place the cake in the refrigerator for about 15 minutes to allow the icing to firm up. This will make it easier to add the final layer without picking up crumbs from the cake.
Another beginner-friendly technique is piping basic borders and decorations using a piping bag and different tips. Start by filling a pastry bag with buttercream icing and attach your desired tip. Hold the bag at a 45-degree angle and apply pressure to pipe out even lines or shapes onto your cake. Practice piping simple borders like shells or rosettes on parchment paper before moving on to your actual cake.
Lastly, mastering how to level and torte your cake layers is essential for creating even and professional-looking cakes. Using a serrated knife or a leveled cutter, carefully trim off any domed tops of each layer to create flat surfaces. Once leveled, you can also torte your layers by cutting them in half horizontally and adding fillings between each layer for added flavor and texture.
Basic Techniques
| Technique | Description |
|---|---|
| Crumb Coat | A thin layer of icing applied to seal in crumbs before final frosting |
| Piping Borders | Using a piping bag and different tips to pipe decorative borders or shapes |
| Leveling and Torting Cake Layers | Trimming off any domed tops and cutting layers in half horizontally for fillings |
By mastering these beginner-friendly techniques, you will be well on your way to building a strong foundation in cake decorating. Remember to practice and take your time, as consistency and patience are key. With each cake you create, you’ll gain more confidence and skills to venture into more advanced techniques. So don’t be afraid to start with the basics – they are the building blocks of stunning cake designs.
Edible Decorations
Edible decorations are a fantastic way to elevate the look of your cakes with simple ingredients. Not only do they add visual appeal, but they also provide a delightful burst of flavor. Incorporating edible decorations into your cake designs can truly take them to the next level.
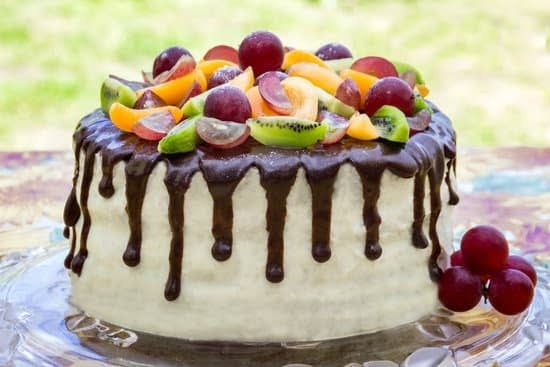
One popular option for adding an elegant touch is using fresh fruits. Strawberries, blueberries, raspberries, and sliced kiwi are just a few examples of fruits that can be arranged on top of or around your cake for a fresh and vibrant look. For a more rustic appearance, consider using sliced citrus fruits like lemons or oranges. Not only do these fruits enhance the aesthetics of your cake, but they also lend a delicious taste to each bite.
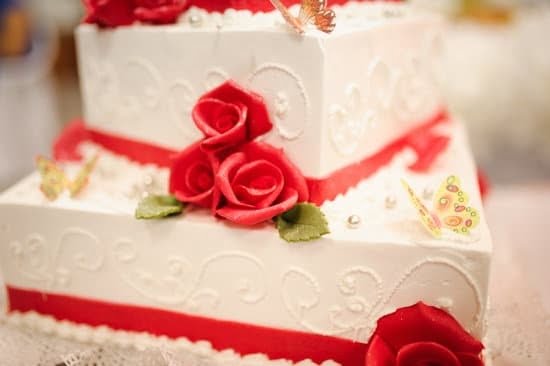
Another great option for edible decorations is flowers. Edible flowers such as roses, pansies, and violets not only provide a beautiful visual element but also add a unique and subtle floral flavor to your cake. Before incorporating flowers into your design, ensure that they are safe for consumption and haven’t been treated with any pesticides or chemicals. It’s important to note that not all flowers are edible – do thorough research before picking any blooms for decorating purposes.
When arranging edible decorations on your cake, it’s important to keep in mind factors such as balance and symmetry. You want the decorations to complement the overall design without overwhelming it. Consider grouping similar elements together or creating patterns using different ingredients. For example, you could alternate between strawberry slices and raspberry clusters around the perimeter of the cake for an eye-catching border.
To preserve the freshness and quality of your edible decorations, it’s ideal to apply them shortly before serving or shortly before displaying the cake at an event. This will help prevent wilting or browning over time due to exposure to air or moisture from the frosting. If you need to prepare in advance, store delicate edible decorations in an airtight container in the refrigerator until you’re ready to use them.
By incorporating edible decorations into your cake designs, you can effortlessly elevate the overall look and taste of your creations. Whether you opt for fresh fruits or edible flowers, these simple ingredients provide an easy and effective way to add a touch of elegance to any cake. Experiment with different arrangements and combinations to discover your own unique edible decorations that will impress both visually and gastronomically.
Buttercream Basics
Buttercream is a popular icing choice for cakes due to its delicious taste and versatility in design. In this section, we will delve into the basics of working with buttercream and explore different techniques to achieve smooth and professional-looking finishes.
To begin, let’s discuss the process of making the perfect buttercream icing. The key to achieving a smooth texture is ensuring that your butter is at room temperature before starting. This allows it to blend seamlessly with the other ingredients. Once your butter is softened, beat it using an electric mixer until it becomes light and fluffy. Gradually add powdered sugar, vanilla extract, and a small amount of milk or heavy cream to thin out the consistency if needed.
Now that you have your buttercream icing ready, let’s move on to applying it smoothly onto your cake. Start by crumb coating your cake, which involves thinly spreading a layer of icing all over the cake to seal in any loose crumbs. This creates a smooth base for your final layer of frosting.
Using an offset spatula, apply a generous amount of buttercream on top of the crumb coat and spread it evenly across the cake’s surface. To achieve a perfectly smooth finish, hold the spatula parallel to the cake and use long, sweeping motions while turning the cake on a turntable.
Piping techniques can also be used with buttercream to create various designs and patterns on cakes. You can use a piping bag fitted with different tips to pipe rosettes, swirls, or even intricate lace-like patterns onto your cakes. Practice with different pressure and movements to achieve different effects. Buttercream also allows for easy color customization by adding gel food coloring or creating ombré effects with varying shades.
In summary, mastering the art of smoothness with buttercream involves creating a perfect consistency for your icing, applying it evenly onto your cake using proper techniques, and exploring various piping techniques for added design elements. With time and practice, you’ll be able to achieve professional-looking finishes that will impress your family and friends.
| Tips for Buttercream Cake Decorating |
|---|
| Always start with softened butter at room temperature. |
| Gradually add powdered sugar to achieve the desired consistency. |
| Clean your spatula frequently while smoothing the icing for a neater finish. |
| Use a turntable for easier and more even application of icing. |
| Experiment with different piping tips and techniques to create unique designs. |
Fondant Fun
Introduction to Fondant
Fondant is a versatile and popular cake decorating medium that can take your cakes to the next level of elegance and charm. It is a smooth, pliable icing that can be rolled out and draped over cakes, creating a seamless finish that gives them a professional look. Fondant also allows for intricate designs and decorations, making it ideal for special occasions such as weddings or birthdays.
Working with Fondant: Step-by-Step Instructions
Working with fondant may seem intimidating at first, but with some practice and patience, you can create beautiful designs on your cakes. Here is a step-by-step guide on how to work with fondant:
- Prepare your cake: Before applying the fondant, make sure your cake is covered in a thin layer of buttercream icing or ganache. This will help the fondant adhere to the cake.
- Roll out the fondant: Knead the fondant until it becomes soft and pliable. Dust your work surface with powdered sugar or cornstarch to prevent sticking. Roll out the fondant into a large, thin sheet using a rolling pin.
- Cover the cake: Carefully lift the rolled-out fondant sheet and drape it over your cake. Smooth it gently with your hands or use a fondant smoother tool to remove any air bubbles or wrinkles.
- Trim excess fondant: Use a sharp knife or pizza cutter to trim off any excess fondant from around the base of the cake.
- Decoration: Once your cake is covered in fondant, let your creativity soar. Use various tools such as cutters, molds, or embossers to create different shapes, textures, and patterns on the surface of the cake.
Creating Fondant Accents and Figures
Fondant allows you to add charming accents and intricate figures to your cakes. Here’s how you can create some popular fondant decorations:
- Fondant bows: Roll out a small piece of fondant and cut it into thin strips. Cross two strips over each other to form the shape of a bow, then pinch the center together. Attach the bow to your cake using a little water or edible glue.
- Fondant flowers: Roll out colored fondant and use various flower-shaped cutters to create petals. Layer the petals together using a small amount of water or edible glue, and add a small ball of fondant at the center for the flower’s stamen. Let them dry before placing them on your cake.
- Fondant figurines: You can sculpt delightful figurines such as animals, people, or objects with fondant. Start with a base shape and gradually add details by shaping small pieces of fondant and attaching them using water or edible glue.
With these simple techniques, you can elevate your cake decorations and impress your guests with elegant designs made from fondant.
Quick Tips for Stunning Results
When it comes to cake decorating, every baker aspires to create a masterpiece that not only tastes delicious but also looks stunning. With a few quick tips and tricks up your sleeve, you can achieve impressive results and take your cake decorating skills to the next level. Here are some key pointers to help you get the most out of your efforts and create cakes that are sure to leave a lasting impression.
Invest in Quality Ingredients
One of the secrets to achieving stunning results is using high-quality ingredients. From the flour to the icing, each ingredient plays a crucial role in producing a cake that is both delectable and visually appealing. Opt for fresh and flavorful ingredients, such as organic fruits or premium chocolate, to elevate the taste and appearance of your creations. Additionally, consider using natural food coloring or edible glitter for an extra touch of sparkle.
Plan Ahead
Before diving into your cake decorating project, take a moment to plan ahead. Visualize how you want your cake to look at the end, and think about the colors, textures, and design elements you want to incorporate. This will help you organize your time effectively and ensure smooth execution without any last-minute stress. Create a checklist of tasks, gather all necessary materials in advance, and allow yourself enough time for each step of the process.
Practice Piping Techniques
Piping is an essential skill in cake decoration that can add intricate details and beautiful designs to your cakes. Invest time in practicing various piping techniques like rosettes, shells, borders, or writing messages using different piping tips. Experiment with different pressure levels on the piping bag to achieve varying textures and effects. Remember that practice makes perfect, so don’t be discouraged if your first attempts aren’t flawless – keep honing your skills.
Add Texture and Dimension
To make your cakes visually captivating, consider adding texture and dimension to your designs. Use tools like stencils, embossing mats, or textured rolling pins to create unique patterns and impressions on fondant or buttercream. You can also experiment with different piping techniques, such as ruffles or basketweave, to add depth and interest to your cake’s exterior. Adding edible decorations like sugar flowers or chocolate curls can offer additional textures and elevate the overall look of your creation.
By following these quick tips for stunning results, you’ll be well on your way to becoming a master cake decorator. Remember that practice, patience, and creativity are essential in developing your skills further. So, don’t be afraid to experiment and think outside the box. With dedication and a little bit of artistic flair, you’ll be creating breathtaking cakes that will impress both your family and friends in no time.
Showcasing Simple Cake Designs
When it comes to cake decorating, the design is often what makes a cake truly memorable. Whether you’re celebrating a birthday, wedding, or any other special occasion, having a beautifully designed cake can add that extra touch of magic and make the event even more memorable. In this section, we will showcase a collection of simple yet visually stunning cake designs that you can recreate for any occasion.
For birthdays, consider a vibrant and playful design that captures the celebratory spirit. A popular choice is a colorful drip cake decorated with sprinkles and topped with candles. To achieve this look, start by frosting your cake with a smooth layer of buttercream icing in your desired color.
Then, take melted chocolate or candy melts of contrasting colors and drizzle them over the edges of the cake to create the “drip” effect. Finish off by arranging colorful sprinkles on top and placing birthday candles for an added festive touch.
For weddings or anniversaries, elegant and sophisticated designs are often preferred. A classic option is a naked cake adorned with fresh flowers. Begin by stacking layers of your favorite cake flavor without fully covering them with frosting – this technique gives the cake an organic and rustic feel. Once stacked, carefully place flowers in between each layer and arrange them on top as well. Choose flowers that match the color palette of the event for a cohesive look.
For baby showers or gender reveal parties, consider a creative twist on traditional designs. One idea is a ruffle ombre cake which features delicate ruffles cascading down the sides in varying shades of one color.
Start by dividing your buttercream icing into different bowls and tinting each portion with progressively darker shades of the chosen color. Using an offset spatula or piping bag fitted with a petal tip, create ruffles starting from the bottom edge and working your way up to cover the entire cake.
Remember, these designs are just a starting point. Feel free to personalize and customize each design to make it uniquely yours. Add personalized toppers, edible glitter, or even themed decorations like fondant figures. With the knowledge and techniques provided in this article, you have the power to create beautiful cakes that will be the centerpiece of any celebration. So go ahead and let your creativity shine.
Share Your Creations.
We hope this article has inspired you to dive into the wonderful world of simple cake decorating. Now it’s your turn to put your newfound knowledge and skills into practice. We would love for you to try out these ideas, adapt them to suit different occasions, and share your creations with us in the comments section below. Don’t hesitate to ask any questions or seek further guidance – we’re here to support you on your cake decorating journey.
Conclusion
In conclusion, exploring the art of simple cake decorating ideas has revealed the endless possibilities and creativity that can be achieved with just a few basic techniques and ingredients.
Throughout this blog post, we have discussed the essential tools needed for cake decoration, beginner-friendly techniques to build a strong foundation, various edible decorations to elevate cakes, mastering the art of smooth buttercream icing, adding charm and elegance with fondant, quick tips for stunning results, and inspiring cake designs for every occasion.
Now that you are equipped with these ideas and knowledge, it is time to put them into practice. I encourage you to take what you have learned and start experimenting with your own creations. Don’t be afraid to try new techniques or incorporate different ingredients – that’s where true innovation comes from.
Remember, Rome wasn’t built in a day, and neither were perfectly decorated cakes. Practice makes perfect, so keep experimenting and refining your skills. Share your creations on social media or with friends and family; their support and feedback will motivate you to continue improving.
If you have any questions or need further guidance along the way, I invite you to leave a comment below. This blog post is meant to foster a community of cake decorators who can learn from each other and provide support.
So go ahead – let your creativity flow and enjoy the process of cake decorating. Your next masterpiece could be just one idea away.

Welcome to my blog about home and family. This blog is a place where I will share my thoughts, ideas, and experiences related to these important topics. I am a stay-at-home mom with two young children. I hope you enjoy reading it! and may find some helpful tips and ideas that will make your home and family life even better!


