Gerbera daisies are not just beautiful flowers to brighten up a garden; they can also be transformed into stunning cake decorations. In this article, we will show you how to make Gerbera Daisy cake decorations that will elevate any cake design to the next level. Whether you’re a seasoned baker or a novice in the kitchen, creating these edible flower embellishments is a fun and rewarding project that will impress your family and friends.
To make Gerbera Daisy cake decorations, you’ll need a few essential supplies such as fondant, edible food coloring, shaping tools, and a rolling pin. The process involves preparing the fondant, creating the center of the Gerbera Daisy, forming the petals, assembling the flower decoration, and adding finishing touches. With some patience and creativity, you can craft realistic-looking Gerbera Daisies that will add a touch of elegance to any cake.
Whether you’re looking to decorate a birthday cake, wedding cake, or special occasion treat, Gerbera Daisy cake decorations offer endless possibilities for customization. By following our step-by-step guide and incorporating our tips and tricks for perfecting your creations, you’ll soon be able to showcase your skills in sugar artistry. Stay tuned as we delve deeper into the world of making Gerbera Daisy cake decorations and explore various ways to incorporate them into different cake designs.
Supplies Needed for Making Gerbera Daisy Cake Decorations
Gerbera daisy cake decorations can add a beautiful and vibrant touch to any cake design. To create these eye-catching decorations, you will need some essential supplies to get started. Here is a list of the supplies needed for making gerbera daisy cake decorations:
- White fondant
- Gel food coloring in various colors (such as yellow, pink, orange)
- Fondant rolling pin
- Flower petal cutters in different sizes
- Ball tool or modeling tool
- Foam pad for shaping petals
- Small paintbrush
- Gum glue or water for adhering pieces together
Once you have gathered all the necessary supplies, you are ready to begin the process of creating your gerbera daisy cake decorations. The key to making realistic and beautiful gerbera daisies lies in the preparation and technique used in shaping the fondant.
To start, it is important to color your white fondant using gel food coloring. Depending on the color of gerbera daisy you wish to create, mix the gel food coloring into the fondant until you achieve the desired shade. Remember that gerbera daisies come in various colors such as bright yellows, oranges, pinks, and reds.
After coloring your fondant, roll it out thinly with a fondant rolling pin. Use flower petal cutters in different sizes to cut out petals for your gerbera daisy. Once you have cut out the petals, use a ball tool or modeling tool to thin out the edges gently. Place each petal on a foam pad and use a small paintbrush to add texture by gently pressing lines onto each petal.
By following these steps and utilizing the right supplies, you can create stunning gerbera daisy cake decorations that will surely impress your guests at any special occasion. Experiment with different colors and sizes to customize your designs and elevate your cake decorating skills.
Preparing the Fondant for Gerbera Daisy Cake Decorations
Gathering Your Ingredients
To begin making gerbera daisy cake decorations, you will need to prepare the fondant first. Start by gathering all the necessary ingredients such as marshmallows, powdered sugar, water, and any food coloring you may want to use. It’s essential to have a clean workspace and tools before starting this process.
Melting the Marshmallows
One of the key steps in preparing fondant for gerbera daisy cake decorations is melting the marshmallows. Place them in a microwave-safe bowl with a splash of water and heat in short intervals, stirring in between until they are completely melted. Be careful not to overheat them as this can affect the texture of your fondant.
Mixing in the Powdered Sugar
Once the marshmallows are melted, gradually add sifted powdered sugar into the bowl while stirring continuously. Keep adding sugar until the mixture forms a sticky dough-like consistency. You can also add food coloring at this stage to achieve the desired color for your gerbera daisy decorations. Knead the fondant on a clean surface dusted with powdered sugar until it becomes smooth and pliable.
By following these steps on how to make gerbera daisy cake decorations, you will be able to create beautiful and intricate floral designs that will wow your guests. Don’t be afraid to experiment with different colors and shapes to customize your creations further. With practice and patience, you’ll soon master the art of making stunning gerbera daisy cake decorations that will elevate any cake design.
Creating the Center of the Gerbera Daisy
Gerbera daisies are beautiful flowers that can add a touch of elegance to any cake design. Creating the center of the Gerbera Daisy is an essential step in making realistic and eye-catching cake decorations. Here’s how to make the perfect center for your Gerbera Daisy cake decoration:
To create the center of the Gerbera Daisy, you will need the following supplies:
- Brown fondant or gum paste
- Small round piping tip
- Edible gold dust or edible brown coloring powder
- Foam pad
Here’s a step-by-step guide on how to make the center of the Gerbera Daisy:
- Roll out a small piece of brown fondant or gum paste into a thin snake-like shape.
- Cut the rolled-out fondant into small pieces, about 1/4 inch in length.
- Using the small round piping tip, gently press each piece of fondant onto a foam pad to create a cup-like shape.
- Once you have created enough cup-shaped pieces, dust them with edible gold dust or brown coloring powder to give them a realistic look.
By following these steps, you can easily create lifelike centers for your Gerbera Daisy cake decorations. The attention to detail in making the center of the flower will elevate the overall appearance of your cake design and impress your guests with your skill and creativity.
Remember that practice makes perfect when it comes to creating realistic floral decorations for cakes. Experiment with different sizes and shapes for the center of your Gerbera Daisies to achieve a truly unique and stunning result that will make your cakes stand out from the rest. Explore different color combinations and techniques to find what works best for your specific cake design and style.
Making the Petals for the Gerbera Daisy
Gerbera daisies are known for their vibrant and colorful petals, making them a popular choice for cake decorations. To create lifelike gerbera daisy cake decorations, you will need to pay attention to the details when making the petals. Here is a step-by-step guide on how to make realistic gerbera daisy petals out of fondant.
To start making the petals for your gerbera daisy cake decoration, you will need to roll out your chosen colored fondant to a thin, even thickness. Make sure to dust your work surface with powdered sugar or cornstarch to prevent the fondant from sticking. Using a petal-shaped cutter or a sharp knife, carefully cut out individual petal shapes from the fondant. You can create different sizes of petals to add depth and dimension to your gerbera daisy.
Once you have cut out the petal shapes, use a ball tool or the round end of a paintbrush to thin out and ruffle the edges of each petal. This will give them a more natural and realistic look. Gently curve each petal by wrapping it around a foam pad or rolling pin to create a subtle curve.
Repeat this process for each petal needed for your gerbera daisy cake decoration. Finally, allow the fondant petals to dry and firm up slightly before assembling them into a beautiful gerbera daisy flower atop your cake.
| Supplies Needed | Notes |
|---|---|
| Colored Fondant | Choose colors that mimic real gerbera flowers |
| Petal Cutter or Sharp Knife | Select tools based on desired petal shape and size |
| Ball Tool or Paintbrush | To thin out and ruffle petal edges |
By following these steps and paying attention to detail in making the petals for your gerbera daisy cake decorations, you can achieve stunning results that will impress any recipient of your beautifully decorated cake. Be sure to experiment with different colors and sizes of petals to create unique and eye-catching gerbera daisies for your cakes.
Assembling the Gerbera Daisy Cake Decorations
Gerbera daisy cake decorations are a beautiful and vibrant addition to any cake design. Assembling these delicate flowers requires attention to detail and precision to ensure they look realistic and stunning. To master the art of creating Gerbera daisy cake decorations, follow these steps on how to assemble them like a pro.
To start assembling your Gerbera daisy cake decorations, begin by carefully stacking the petals you have created around the center of the flower. Make sure to overlap each petal slightly to create a natural and full look. Use edible glue or water to adhere the petals together securely.
Once all the petals are attached around the center, gently press them together to ensure they are firmly in place. Be mindful of the arrangement of the petals, as this will determine the overall look of your Gerbera daisy cake decoration. Take your time and adjust any petals as needed to achieve the desired shape.
After assembling the petals, allow the Gerbera daisy cake decoration to dry and set for a few hours before placing it on your finished cake. This will help prevent any accidental damage or misshaping of the flower during transportation or handling. Once dry, carefully place your beautifully assembled Gerbera daisy on top of your cake for a show-stopping finish.
| Supplies Needed | Notes |
|---|---|
| Fondant | Use food coloring gel for custom colors |
| Edible Glue or Water | For adhering petals together |
| Petal Cutter Set | To create uniform petals |
Adding Finishing Touches to the Gerbera Daisy Cake Decorations
Coloring the Petals
Once you have crafted the petals for your gerbera daisy cake decorations, it’s time to add a pop of color. Using edible food coloring, you can create vibrant hues that mimic the natural shades of a gerbera daisy. For a realistic effect, consider blending different colors to achieve a gradient look on each petal. Take your time to carefully paint each petal with a small brush, ensuring an even and smooth finish.
Texturizing the Center
To elevate the authenticity of your gerbera daisy cake decorations, pay attention to texturizing the center of the flower. You can use various tools such as veining tools or ball tools to create realistic lines and grooves on the fondant center. Additionally, consider adding edible dust in shades of yellow or brown to give the center more depth and dimension. This extra step will make your gerbera daisy cake decorations truly stand out on any cake design.
Glossing for Shine
To make your gerbera daisy cake decorations appear even more lifelike and eye-catching, consider adding a touch of gloss. Edible varnish or clear piping gel can be applied sparingly to the petals and center using a clean brush.
The gloss will not only enhance the colors but also give your floral decorations a glossy finish that mimics dewdrops glistening in the sunlight. Take care not to overdo it and remember that less is often more when applying gloss to your gerbera daisy cake decorations.
Tips and Tricks for Making Perfect Gerbera Daisy Cake Decorations
Gerbera daisy cake decorations add a beautiful and elegant touch to any cake. While they may seem intricate and complex to make, with the right tips and tricks, you can easily create perfect Gerbera Daisy cake decorations that will impress everyone at your next event. Here are some helpful suggestions on how to achieve flawless results:
When making Gerbera Daisy cake decorations, it is crucial to use the right tools and supplies. Make sure you have a set of flower cutters in various sizes, edible food coloring gel or dust, a foam pad for shaping petals, a ball tool for thinning edges, and a small brush for adding details. Having these essentials on hand will make the process much smoother.
One key tip for creating realistic Gerbera Daisy cake decorations is to pay attention to detail when shaping the petals. Use a gentle touch when thinning out the edges of each petal with a ball tool to give them a lifelike appearance. Additionally, vary the sizes of the petals by using different cutters to add dimension and depth to your daisies.
Another important aspect of making perfect Gerbera Daisy cake decorations is ensuring that your fondant is the right consistency. It should be pliable but not sticky, so knead it well before rolling it out.
If it becomes too soft or sticky while working with it, dust your hands and work surface with cornstarch or powdered sugar to prevent it from sticking. By following these tips and tricks, you can create stunning Gerbera Daisy cake decorations that will elevate the look of any cake design.
Inspiration for Using Gerbera Daisy Cake Decorations in Different Cake Designs
Gerbera daisies are not only beautiful flowers but also make stunning cake decorations. Their vibrant colors and unique shape can add a touch of elegance to any cake design. Whether you are making a birthday cake, wedding cake, or just a special dessert, incorporating gerbera daisy decorations can elevate the overall look and feel of your creation.
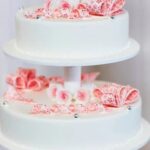
One way to use gerbera daisy cake decorations is to create a cascading effect on a tiered cake. By strategically placing these edible flowers along the edges of each tier, you can achieve a whimsical and romantic look that is perfect for weddings or other special occasions. The varying sizes and colors of gerbera daisies can add depth and dimension to your cake design, creating a visually striking centerpiece.
Another idea for using gerbera daisy cake decorations is to cluster them together on top of a single-tiered cake. This arrangement creates a focal point that draws attention to the center of the cake, making it the perfect centerpiece for any celebration.
You can play around with different color combinations and petal arrangements to create a custom look that matches the theme or color scheme of your event. No matter how you choose to incorporate gerbera daisy decorations into your cakes, they are sure to impress your guests and leave them in awe of your baking skills.
Overall, gerbera daisy cake decorations offer endless possibilities for creative expression in cake design. Whether you opt for a simple and elegant look or go all out with bold and vibrant colors, these edible flowers are sure to make a statement on any dessert table. So next time you’re planning a special event or celebration, consider adding gerbera daisy decorations to your cakes and watch as they become the talk of the party.
Conclusion and Final Thoughts on Making Gerbera Daisy Cake Decorations
In conclusion, creating Gerbera Daisy cake decorations can be a fun and creative way to add a touch of beauty and elegance to your cakes. By following the steps outlined in this article, you can easily learn how to make Gerbera Daisy cake decorations that will impress your friends and family.
With the right supplies and a little bit of practice, you can master the art of making these delicate sugar flowers. Remember to take your time when forming the petals and assembling the daisy to ensure a realistic and stunning result. Don’t be afraid to experiment with different colors and sizes to create unique and eye-catching designs.
Whether you are decorating a birthday cake, wedding cake, or any special occasion cake, Gerbera Daisy cake decorations are sure to make a statement. By incorporating these beautiful edible flowers into your creations, you can elevate your desserts to the next level. So why not give it a try and see just how easy it is to make Gerbera Daisy cake decorations that will wow your guests?

Welcome to my blog about home and family. This blog is a place where I will share my thoughts, ideas, and experiences related to these important topics. I am a stay-at-home mom with two young children. I hope you enjoy reading it! and may find some helpful tips and ideas that will make your home and family life even better!


