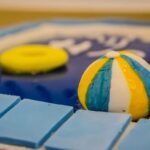
Are you looking to elevate your cake decorating skills? Learn how to make cake decorations with sugar paste, a versatile and easy-to-use medium that can take your creations to the next level. Sugar paste, also known as fondant, allows you to create intricate and beautiful designs that will impress any guest at your next event.
Sugar paste is a popular choice among bakers for its smooth finish and ability to be shaped into various decorations. Whether you are a beginner or an experienced baker, mastering the art of working with sugar paste can open up endless possibilities for your cake decorating projects. From simple shapes to elaborate figures, the creative options with sugar paste are limitless.
In this article, we will guide you through the process of using sugar paste in cake decorating, from understanding essential tools and materials to creating basic shapes and figures. Additionally, we will explore advanced techniques for detailing cake decorations with sugar paste and provide tips and tricks for troubleshooting common issues. Get ready to unleash your creativity and transform your cakes, cupcakes, and cookies with stunning sugar paste decorations.
Essential Tools and Materials Needed for Making Cake Decorations With Sugar Paste
When it comes to making cake decorations with sugar paste, having the right tools and materials is essential to ensure a successful outcome. Here is a list of some of the essential items you will need to create beautiful and intricate sugar paste decorations:
- Sugar Paste/Fondant: The main ingredient for creating cake decorations with sugar paste is, of course, the sugar paste itself. You can either buy pre-made sugar paste or fondant from stores or make your own at home.
- Rolling Pin: A good quality rolling pin is necessary for rolling out the sugar paste to the desired thickness for shaping and cutting.
- Cutting Tools: Sharp cutting tools like knives, scissors or even specialized fondant cutters are crucial for cutting out shapes and figures from the sugar paste.
- Modeling Tools: These tools come in various shapes and sizes and are perfect for shaping and adding detail to your sugar paste decorations.
- Food Coloring: Gel food coloring works best when coloring sugar paste as it does not alter its consistency. Make sure to have a variety of colors on hand to create vibrant decorations.
Now that you have all the necessary tools and materials prepared, you can begin experimenting with different techniques on how to make cake decorations with sugar paste. Let’s move on to the next section where we will discuss a step-by-step guide on how to color and prepare your sugar paste for decorating your cakes.
Step-by-Step Guide on How to Color and Prepare Sugar Paste
Sugar paste, also known as fondant, is a versatile and popular choice for cake decorating due to its smooth texture and moldable nature. One of the key aspects of working with sugar paste is mastering the art of coloring and preparing it for creating beautiful decorations for your cakes. Let’s delve into a step-by-step guide on how to color and prepare sugar paste effectively.
Choosing the Right Coloring
When it comes to coloring sugar paste, it’s essential to use gel-based or powdered food coloring instead of liquid ones. These types of coloring agents will not alter the consistency of the sugar paste, ensuring that it remains pliable while adding vibrant hues to your decorations. Make sure to start with small amounts of color and gradually add more until you achieve your desired shade.
Kneading and Conditioning
Before adding any color, begin by kneading the sugar paste to ensure it’s soft and pliable. Once you have achieved a smooth consistency, create a well in the center of the paste where you will add your color. Start by adding a small amount of gel or powder color to the well and fold the edges over to encapsulate the color. Knead the paste again until the color is evenly distributed, adding more if needed.
Storing and Resting
After coloring your sugar paste, wrap it tightly in plastic wrap or place it in an airtight container to prevent drying out. Let the colored sugar paste rest at room temperature for at least 30 minutes before using it for decorations. This resting period allows the colors to deepen and develop further, ensuring a more vibrant result when creating your cake decorations using sugar paste.
By following these steps on how to color and prepare sugar paste effectively, you’ll be ready to create stunning decorations for your cakes with ease and confidence. Experiment with different colors, techniques, and designs to unleash your creativity and elevate your cake decorating skills using this versatile medium – sugar paste.
Creating Basic Shapes and Figures With Sugar Paste
Are you looking to add a personal touch to your cakes with custom decorations? Sugar paste, also known as fondant, is a versatile medium that can be shaped and molded into various designs to elevate your baked creations. In this section, we will explore how you can create basic shapes and figures using sugar paste for your cake decorating projects.
To get started with making cake decorations with sugar paste, here is a list of essential tools and materials you will need:
- Rolling pin
- Fondant smoother
- Various sized cookie cutters
- Modeling tools
- Food coloring gels or dusts
- Cornstarch or powdered sugar for dusting
Now, let’s dive into the process of creating basic shapes and figures with sugar paste. Here’s a step-by-step guide on how to do it:
- Knead the sugar paste until smooth and pliable.
- Roll out the sugar paste on a clean surface dusted with cornstarch or powdered sugar.
- Use the cookie cutters to create different shapes such as circles, squares, hearts, or stars.
- If you want to make simple figures like flowers or animals, use the modeling tools to sculpt them from the rolled-out sugar paste.
With these basic techniques mastered, you can begin experimenting with more intricate designs and details. Practice makes perfect when working with sugar paste in cake decorating, so don’t be afraid to get creative and try new ideas. Soon enough, you’ll be able to impress your friends and family with beautifully crafted sugar paste decorations on your baked treats.
Advanced Techniques for Detailing Cake Decorations With Sugar Paste
Once you have mastered creating basic shapes and figures with sugar paste, you can move on to more advanced techniques to add intricate details to your cake decorations. One popular method is using silicone molds to create delicate designs such as flowers, leaves, or even lace patterns. Simply press the sugar paste into the mold, carefully remove it, and then attach it to your cake using a small amount of edible glue.
Another advanced technique for detailing cake decorations with sugar paste is hand-painting. This allows you to add custom designs and intricate patterns to your creations. To hand-paint with sugar paste, mix edible food coloring with a small amount of vodka or clear extract to create a paint-like consistency. Use a fine-tipped brush to apply the colors onto your sugar paste decorations.
For those looking to take their cake decorating skills to the next level, consider learning how to make embossed designs with sugar paste. Using embossing tools or even household items like lace doilies or textured fabric, you can create beautiful raised patterns on your sugar paste decorations. Simply press the chosen item onto the rolled-out sugar paste, lift it gently, and admire the stunning embossed effect it leaves behind.
| Advanced Cake Decorating Tips | Data |
|---|---|
| Use silicone molds for intricate designs | Create delicate flowers and lace patterns easily |
| Hand-painting technique | Mix food coloring with vodka for detailed designs |
| Embossing designs on sugar paste | Use tools or household items for raised patterns |
Tips and Tricks for Working With Sugar Paste in Cake Decorating
Working with sugar paste in cake decorating can be both fun and challenging. To ensure a successful outcome, it’s important to have some tips and tricks up your sleeve. Here are some valuable tips for working with sugar paste to create stunning cake decorations:
Kneading and Rolling Out Sugar Paste
One of the key aspects of working with sugar paste is kneading it properly before use. This helps to make the paste more pliable and easier to work with. When rolling out sugar paste, make sure to dust your work surface with cornstarch or powdered sugar to prevent sticking. Use a rolling pin specifically designed for fondant or sugar paste to achieve an even thickness.
Preventing Sugar Paste From Drying Out
Sugar paste can easily dry out if exposed to air for too long. To prevent this, keep unused sugar paste covered with plastic wrap or a damp cloth when not in use. If you notice that your sugar paste is starting to dry out, knead in a small amount of vegetable shortening to restore its elasticity.
Adding Details and Texture
To add texture or details to your sugar paste decorations, consider using tools such as embossers, molds, or shaping tools. These tools can help you create intricate designs like flowers, leaves, or patterns on your cake decorations. Experiment with different techniques and tools to enhance the visual appeal of your creations.
By keeping these tips and tricks in mind while working with sugar paste, you’ll be better equipped to create beautiful and professionally finished cake decorations. Practice patience and precision when handling the sugar paste, and don’t be afraid to get creative with your designs.
Ideas for Using Sugar Paste Decorations on Cakes, Cupcakes, and Cookies
One of the most exciting parts of cake decorating with sugar paste is exploring the endless possibilities when it comes to creating beautiful and unique decorations for your baked goods. From simple designs to intricate details, sugar paste offers a versatile medium to add a special touch to your cakes, cupcakes, and cookies. Whether you are a beginner or an experienced baker, there are plenty of ideas to inspire you in using sugar paste decorations.
One popular idea for using sugar paste decorations is to create themed cakes for special occasions such as birthdays, weddings, or holidays. For example, you can make cute animal-shaped toppers for a baby shower cake or elegant floral accents for a wedding cake. With some practice and creativity, you can customize your decorations to suit any theme or color scheme. You can also use cookie cutters or silicone molds to make consistent shapes for your sugar paste decorations.
Another creative way to use sugar paste decorations is to incorporate them into cupcakes. Top your cupcakes with whimsical figures like unicorns or mermaids made from sugar paste. You can also make 3D flower decorations or personalized initials using alphabet cutters to add a personal touch to your cupcakes. Decorating cookies with sugar paste is another fun idea – you can cover cookies with a smooth layer of colored sugar paste and then add details with edible markers or royal icing.
When using sugar paste decorations on your baked goods, remember that they should be stored in a cool, dry place away from direct sunlight until ready to use. Store any leftover decorations in an airtight container at room temperature for future use. Whether you are creating simple shapes or intricate designs, working with sugar paste allows you to let your imagination run wild and bring your dessert creations to life.
| Ideas for Using Sugar Paste Decorations | On Cakes, Cupcakes, and Cookies |
|---|---|
| Themed cakes for special occasions | Create animal-shaped toppers for baby showers |
| Cupcake decorations | Incorporate whimsical figures like unicorns |
| Cookie decorations | Cover cookies with colored sugar paste and add details |
Troubleshooting Common Issues When Working With Sugar Paste
In conclusion, mastering the art of making cake decorations with sugar paste can truly elevate your baking game to the next level. By following the step-by-step guide on how to color and prepare sugar paste, creating basic shapes and figures, and incorporating advanced techniques for detailing decorations, you can unleash your creativity in decorating cakes, cupcakes, and cookies.
Even though working with sugar paste may sometimes present challenges, it is important not to get discouraged. Utilizing the essential tools and materials mentioned in this article will help you navigate any troubleshooting issues that may arise during the process. Remember that practice makes perfect, so don’t be afraid to experiment and learn from your mistakes.
Whether you are a beginner or a seasoned baker, learning how to make cake decorations with sugar paste is a valuable skill that will impress your friends and family. By incorporating these tips and tricks into your baking routine, you can create stunning and edible works of art that will surely be the highlight of any celebration. So go ahead, unleash your creativity, and start decorating with sugar paste today.
Frequently Asked Questions
How Do You Stick Sugar Paste Decorations to a Cake?
Sugar paste decorations can be easily attached to a cake by using a small amount of edible glue or water. Simply brush the back of the decoration with a small amount of glue or water and gently press it onto the cake.
What Is the Sugar Paste Used to Decorate Cakes?
Sugar paste, also known as fondant, is a pliable icing that is commonly used to decorate cakes. It is made from sugar, water, and glucose and has a smooth texture that can be rolled out and molded into different shapes to create intricate designs on cakes.
How Far in Advance Can You Make Sugar Paste Decorations?
Sugar paste decorations can be made in advance and stored for several weeks if kept in an airtight container away from direct sunlight and moisture. This allows for better planning and preparation when decorating cakes for special occasions without having to rush at the last minute.

Welcome to my blog about home and family. This blog is a place where I will share my thoughts, ideas, and experiences related to these important topics. I am a stay-at-home mom with two young children. I hope you enjoy reading it! and may find some helpful tips and ideas that will make your home and family life even better!


