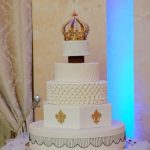
Do you want to learn how to decorate a cake with fondant? Fondant is a versatile and popular way to add a professional, polished look to your cakes. In this article, we will cover everything you need to know about using fondant to decorate your baked creations. From understanding the basics of working with fondant to troubleshooting common decorating issues, we’ve got you covered.
First, we will start by introducing the concept of fondant and its basic properties. Then, we’ll discuss the necessary tools and supplies you’ll need for decorating with fondant. After that, we will guide you through the process of preparing your cake for fondant decoration, rolling and applying fondant to the cake, creating shapes and designs, adding color and texture, as well as providing tips and tricks for achieving a professional finish.
Whether you’re a beginner looking to learn the fundamentals or an experienced baker wanting to up your decorating game, our step-by-step guide will help you master the art of decorating cakes with fondant. So let’s dive in and unlock the secrets of creating stunning fondant decorations for your cakes.
Necessary Tools and Supplies for Decorating With Fondant
When it comes to decorating a cake with fondant, having the right tools and supplies is essential for achieving a professional look. Here are some of the necessary items you’ll need to have on hand before you start working with fondant:
- Fondant: Of course, the star of the show is the fondant itself. You can choose to make your own or purchase pre-made fondant in various colors from a bakery supply store. Make sure to have enough fondant to cover the entire surface of your cake.
- Rolling Pin: A smooth, non-stick rolling pin is crucial for rolling out the fondant to the desired thickness. A large, heavy rolling pin works best for this task.
- Cornstarch or Powdered Sugar: Sprinkling your work surface with cornstarch or powdered sugar will prevent the fondant from sticking as you roll it out.
- Fondant Smoother: This tool helps eliminate air bubbles and smooth out any wrinkles when applying the fondant to the cake.
- Exacto Knife or Pizza Cutter: For trimming excess fondant from around the base of the cake once it’s been covered.
- Gel Food Coloring: If you plan to color your fondant, gel food coloring in assorted shades will give you vibrant hues without altering the texture of the fondant.
Having these tools and supplies at your disposal will make decorating a cake with fondant a much easier and more enjoyable process. With everything ready, you can focus on creating beautiful designs and decorations for your masterpiece.
Preparing the Cake for Fondant Decoration
Before you can begin decorating a cake with fondant, it’s important to ensure that the cake itself is properly prepared. The first step is to make sure that the cake has been baked and cooled completely.
Warm or freshly-baked cakes can cause the fondant to become too soft and difficult to work with. Once the cake has cooled, it should be leveled and crumb-coated with a thin layer of buttercream or ganache to create a smooth surface for the fondant.
After crumb coating, it’s recommended to chill the cake in the refrigerator for at least 30 minutes. This will help the buttercream or ganache set, making it easier to handle when applying the fondant. Once chilled, you can remove the cake from the refrigerator and gently smooth out any imperfections in the frosting using a bench scraper or offset spatula. This will provide an even base for the fondant and ensure a professional-looking finish.
Finally, before rolling out your fondant, lightly dust your work surface with powdered sugar or cornstarch to prevent sticking. You can also use a non-stick silicone mat for this purpose. It’s important to roll out your fondant to approximately 1/4 inch thickness in order to cover your cake smoothly without tearing or stretching. Remember that excessive handling of fondant can lead to drying out, so work efficiently but carefully.
| Step | Description |
|---|---|
| Cake Preparation | Ensure that the cake has been baked and cooled completely before leveling and crumb-coating with buttercream or ganache. |
| Chilling | Chill the crumb-coated cake in the refrigerator for at least 30 minutes before smoothing out imperfections. |
| Rolling Fondant | Lightly dust work surface with powdered sugar and roll out fondant to approximately 1/4 inch thickness for best results. |
By following these steps, you can ensure that your cake is properly prepped and ready for decoration with fondant. Proper preparation is key to achieving a flawless finished product that will impress any guest of honor at your special event.
Rolling and Applying Fondant to the Cake
Once you have prepared your cake and gathered all necessary tools and supplies for decorating with fondant, it’s time to roll and apply the fondant to the cake. This step is crucial in achieving a smooth and professional-looking finish for your decorated cake.
To roll and apply fondant to the cake, follow these steps:
- Start by dusting your work surface with powdered sugar to prevent the fondant from sticking.
- Knead the fondant until it becomes soft and pliable, then use a rolling pin to roll it out into a circle that is slightly larger than the size of your cake.
- Carefully lift the rolled-out fondant using a rolling pin or by draping it over your forearm, then gently place it onto the top of the cake.
- Smooth out any air bubbles or wrinkles by gently pressing the fondant against the sides of the cake, working from the top downwards.
It’s important to remember that practice makes perfect when it comes to rolling and applying fondant to a cake. Don’t be discouraged if your first few attempts are not flawless – with some patience and persistence, you will soon master this essential skill in cake decorating.
Adding this key ingredient will ensure delicious taste – Practiced Hands. With practice, all tools create magic. Let’s dive into “How to decorate cakes with Fondants”.
Creating Shapes and Designs With Fondant
Once you have successfully rolled and applied the fondant to your cake, the fun part begins – creating shapes and designs. This is where your creativity can truly shine as you can make anything from flowers to animals using fondant. Using fondant cutters, molds, and shaping tools, you can bring your imagination to life on top of the cake.
One popular technique for creating shapes and designs with fondant is using cookie cutters. This is an easy way to create uniform shapes such as hearts, stars, or even letters for a personalized touch. Simply press the cookie cutter into the rolled out fondant and carefully lift the shape onto the cake.
If you want to get more intricate with your designs, consider investing in some fondant shaping tools. These tools allow you to create 3D shapes or add detailed textures to your fondant decorations. For example, ball tools are great for creating flower petals with realistic curves while veining tools can add lifelike details to leaves or other natural elements.
Adding color to your fondant decorations can also enhance their visual appeal. You can use food coloring gels or dusts specifically made for fondant to achieve vibrant colors. To add texture, consider using edible luster dust or edible glitter for a shimmering effect.
With these techniques and tools, you can take your cake decorating skills to the next level and wow everyone with beautifully designed fondant creations that are sure to impress.
Adding Color and Texture to Fondant Decorations
Coloring Fondant
To add color to your fondant, start by using gel or paste food coloring for the best results. Liquid coloring can affect the consistency of the fondant and make it too sticky. Knead a small amount of coloring into the fondant until it is evenly distributed, adding more as needed to achieve the desired shade. Remember that colors will deepen over time, so start with a small amount of coloring and allow the fondant to rest before adding more.
Creating Textured Effects
Texture can add depth and interest to your fondant decorations. To create texture, use tools such as embossing mats, textured rolling pins, or even household items like lace or ribbons. Press these onto the fondant to create patterns and designs. You can also use sculpting tools and veining tools to add intricate details and dimension to your decorations.
Airbrushing Techniques
For a smooth and professional finish, consider using an airbrush to add color to your fondant decorations. Airbrushing allows for seamless blending of colors and creates a uniform look across the entire cake surface. With practice, you can achieve stunning ombre effects, gradients, and subtle shading that elevate your cake decorating skills.
By mastering techniques for adding color and texture to fondant decorations, you can take your cake decorating abilities to the next level. Experiment with different colors, textures, and airbrushing techniques to create visually stunning cakes that are sure to impress any audience.
Tips and Tricks for a Professional Finish
Smooth Surface Preparation
Before applying fondant to your cake, it’s crucial to ensure that the surface is smooth and free from any bumps or imperfections. To achieve this, consider using a buttercream icing base that can be smoothed out using a spatula or bench scraper. This will create a flawless foundation for your fondant decorations.
Proper Fondant Application
When rolling out your fondant, make sure to dust your work surface and rolling pin with powdered sugar or cornstarch to prevent sticking. Roll the fondant into an even thickness, slightly larger than the size of your cake. Carefully drape the fondant over the cake and gently smooth it onto the surface, working from the top down to avoid air bubbles.
Embellishments and Details
To achieve a professional finish on your fondant-decorated cake, pay attention to small details and embellishments. Utilize various tools such as fondant cutters, embossing mats, and impression tools to create intricate designs and textures on the fondant. Adding delicate flowers, ribbons, or hand-painted details can elevate the overall look of your decorated cake.
Remember that practice makes perfect when it comes to working with fondant. Be patient with yourself as you learn how to decorate cakes with fondant, and don’t be afraid to experiment with different techniques and designs. With these tips and tricks for achieving a professional finish, you’ll be well on your way to creating stunning fondant-decorated cakes that are sure to impress any crowd.
Finishing Touches and Presentation of the Decorated Cake
Once you have successfully covered your cake with fondant and created beautiful designs, it’s time to add the finishing touches to make your masterpiece truly stand out. One important consideration is the border or edging around the base of the cake. You can use fondant cut into strips or create a decorative pattern using a specialty tool. Another option is to use edible pearls, dragees, or other decorative elements to enhance the overall look of your cake.
In addition to the decorations on top of the cake, don’t forget about the display board or plate that will showcase your creation. Choose a board or plate that complements the colors and theme of your cake. You can cover it with colored foil, fabric, or even more fondant to create a cohesive presentation.
Finally, consider how you will transport and present the cake at its final destination. If traveling with the cake, make sure it is secured in a box or container to prevent any accidents during transit. Once at the event, carefully place the cake in its designated spot and step back to admire your handiwork.
Now that you have learned how to decorate a cake with fondant and put in all this effort into creating a beautiful confection, make sure it gets the attention it deserves by presenting it in an attractive and professional manner.
| Decorative Elements | Transportation |
|---|---|
| Use edible pearls or decorative strips for border | Secure cake in a box for transit |
| Select a complementary display board | Place cake carefully at its destination |
Troubleshooting Common Fondant Decorating Issues
Decorating a cake with fondant can be a fun and creative process, but it also comes with its fair share of challenges. Here are some common issues that decorators may encounter when working with fondant, along with some helpful solutions.
One of the most common problems when working with fondant is air bubbles. These pesky bubbles can form when rolling out the fondant or when smoothing it onto the cake. To avoid this issue, make sure to knead the fondant well before rolling it out to remove any air bubbles. When applying the fondant to the cake, use a fondant smoother to gently press out any air pockets.
Another issue that decorators often face is elephant skin, which refers to wrinkling or sagging of the fondant on the cake. This can happen if the fondant is rolled too thin or if it’s not smoothed onto the cake properly. To prevent elephant skin, roll the fondant to an even thickness and work quickly when applying it to the cake. Use a fondant smoother or your hands to gently smooth out any wrinkles as you go.
Lastly, some decorators struggle with cracking or tearing of the fondant while working with it. This can occur if the fondant is too dry or if it’s rolled too thin. To avoid this, make sure to knead in a small amount of shortening or glycerin if your fondant feels dry. Additionally, roll out the fondant to a consistent thickness and handle it carefully when transferring it onto the cake.
By being aware of these common issues and following these troubleshooting tips, decorators can overcome obstacles and achieve a beautiful finish when decorating cakes with fondant. Remember that practice makes perfect, so don’t be discouraged if you encounter challenges along the way – just keep honing your skills and experimenting with different techniques for best results.
Conclusion
In conclusion, decorating a cake with fondant is a fun and creative way to showcase your baking skills and impress your friends and family. By following the necessary steps and utilizing the right tools, you can create a beautifully decorated cake that looks like it came straight from a professional bakery. From rolling and applying the fondant to adding color and texture, each step in the process plays a key role in creating a stunning masterpiece.
One of the most important aspects of decorating with fondant is to practice patience and precision. Taking your time in rolling out the fondant, applying it to the cake, and creating intricate designs will result in a more polished final product. Additionally, experimenting with different colors, textures, and shapes will allow you to unleash your creativity and produce unique decorations for your cakes.
Finally, remember that practice makes perfect when it comes to decorating with fondant. Don’t be discouraged by any initial challenges or mistakes – instead, use them as learning opportunities to improve your skills. With dedication and a bit of creativity, you’ll soon be able to decorate cakes with fondant like a pro. So go ahead, get started on your next cake project and let your imagination run wild.
Frequently Asked Questions
How Do You Put Fondant on a Cake for Beginners?
Putting fondant on a cake for beginners involves rolling out the fondant to the correct size, lifting it carefully over the cake, and smoothing it down with your hands or a fondant smoother. It’s important to work quickly but gently to avoid tearing the fondant.
How Do You Get Fondant to Stick to a Cake?
Getting fondant to stick to a cake requires a thin layer of buttercream or another type of frosting on the cake before applying the fondant. The moisture from the frosting helps adhere the fondant to the cake, creating a smooth surface for decorating.
Can You Put Fondant Directly on a Cake?
Yes, you can put fondant directly on a cake, but it’s essential to ensure that the cake is smooth and free from crumbs before doing so. Applying a thin layer of simple syrup or apricot glaze can also help the fondant adhere better and create a smoother finish on the cake.

Welcome to my blog about home and family. This blog is a place where I will share my thoughts, ideas, and experiences related to these important topics. I am a stay-at-home mom with two young children. I hope you enjoy reading it! and may find some helpful tips and ideas that will make your home and family life even better!


