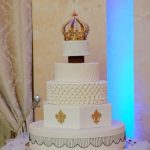
Are you looking to elevate your cake decorating skills? Learn how to decorate cake using fondant for a professional finish. Fondant is a versatile icing that can be used to create smooth, flawless finishes on cakes, making it a favorite among bakers and decorators. Whether you’re a beginner or an experienced baker, mastering the art of fondant decoration can take your creations to the next level.
Fondant is a type of icing that can be rolled out into a thin sheet and draped over cakes for a smooth, elegant finish. It is also used to create intricate designs and decorations, making it an essential tool for anyone looking to create show-stopping cakes. In this article, we’ll explore everything you need to know about working with fondant, from the tools and materials needed to troubleshooting common issues that may arise during the decorating process.
Before diving into the hands-on process of cake decoration with fondant, it’s important to understand what fondant is and its uses in cake decorating. From there, we’ll cover everything from preparing the cake for fondant application to adding final touches and details. By the end of this article, you’ll be equipped with all the knowledge and skills needed to confidently decorate cakes using this versatile icing.
Tools and Materials Needed
When it comes to decorating a cake with fondant, it’s essential to have the right tools and materials to achieve the best results. Here is a comprehensive list of everything you’ll need to get started:
1. Fondant – Of course, the most important item on the list is the fondant itself. You can either make your own fondant from scratch or purchase pre-made fondant in various colors from a baking supply store.
2. Rolling Pin – A long, smooth rolling pin is necessary for rolling out the fondant to the desired thickness.
3. Fondant Smoother – This tool helps smooth out the fondant once it’s been placed on the cake, ensuring a clean and polished finish.
4. Cutting Tools – Sharp knives or pizza cutters are used for cutting and shaping the fondant as needed for decorating.
5. Embossing Tools – These tools are used to create textured designs and patterns on the fondant before applying it to the cake.
6. Food Coloring Gel – If you plan on coloring your own fondant, gel food coloring in various shades will be necessary to achieve your desired colors.
7. Cornstarch or Powdered Sugar – These are used for dusting the work surface when rolling out the fondant to prevent sticking.
8. Cake Decorating Tools – Basic tools such as a turntable, offset spatula, and cake leveler will also be needed for preparing and frosting the cake before applying the fondant.
By ensuring that you have all these tools and materials on hand before starting your cake decorating project, you’ll be well-prepared to create a beautifully decorated cake using fondant.
Preparing the Cake
Before delving into the world of fondant decoration, it is important to ensure that the cake base is properly prepared. Start by leveling the cake layers to ensure a smooth and even surface for the fondant to be applied. This can be done using a serrated knife or a cake leveler, making sure to remove any domed tops or uneven areas.
Once the cake layers are leveled, it’s time to fill and crumb coat the cake. Spread a layer of frosting or ganache between each cake layer, then apply a thin coat of frosting around the entire cake to lock in any crumbs. This step not only adds flavor but also provides a smooth surface for the fondant to adhere to.
After filling and crumb coating, it’s recommended to refrigerate the cake for at least 30 minutes before applying fondant. The chilling process allows the frosting to set and firm up, making it easier to handle when placing the fondant on top.
By following these tips and tricks for preparing the cake before applying fondant, you’ll set yourself up for success in creating a beautifully decorated masterpiece. Taking the time to properly prepare your cake base will make the fondant application process much smoother and more enjoyable.
Working With Fondant
When it comes to cake decorating, working with fondant requires a certain level of precision and technique. In this section, we will provide a step-by-step guide on how to roll out and handle fondant properly to achieve the best results for your cake decoration.
First, it is important to ensure that you have a clean and smooth work surface before rolling out the fondant. Sprinkle some powdered sugar or cornstarch on the surface to prevent sticking. Next, knead the fondant until it is soft and pliable. This will make it easier to roll out without any cracks or tears.
Once the fondant is kneaded properly, use a rolling pin to gently roll it out into an even thickness. Start from the center and roll towards the edges, rotating the fondant as needed to maintain an even shape. Be mindful not to roll it too thin, as this may cause tearing or stretching when transferring it onto the cake.
After rolling out the fondant, carefully lift it using a rolling pin or by gently folding it in half, then unfolding it onto the cake. Smooth out any air bubbles and wrinkles using a fondant smoother or your hands. Trim off any excess fondant using a sharp knife or pizza cutter for a clean finish.
By following these step-by-step instructions, you can ensure that you are handling and rolling out fondant properly for your cake decorating projects. Practice patience and precision to achieve professional-looking results for your beautifully decorated cakes.
Coloring Fondant
When it comes to decorating cakes with fondant, one of the essential skills to master is coloring the fondant to achieve the desired shades and hues. By adding color to fondant, you can create a visually stunning cake that matches your theme or design. Here are some techniques for coloring fondant:
- Gel or Paste Colors: Gel or paste food colors are highly concentrated and are ideal for tinting fondant without affecting its consistency. These colors come in a wide range of shades and are perfect for achieving vibrant and bold hues.
- Avoid using liquid food coloring as it can alter the texture of the fondant and make it too sticky or wet to work with.
- Blending Colors: To create custom shades, you can mix different colors of gel or paste food coloring together. Start with a small amount of each color and gradually add more until you achieve the desired shade.
It’s important to note that when working with colored fondant, it’s best to wear food-safe gloves to prevent staining your hands. Additionally, always knead the colored fondant on a surface dusted with confectioners’ sugar or cornstarch to avoid sticking.
Learning how to color fondant effectively will give you the creative freedom to bring your cake decorating ideas to life. Whether you’re aiming for pastel tones or rich, deep colors, mastering these techniques will elevate your cake designs and impress your friends, family, or clients.
Decorating Techniques
Cut-Outs
One popular technique for decorating a cake using fondant is through the use of cut-outs. This involves rolling out the fondant to a specific thickness, then using various shaped cutters to create designs and patterns on the surface of the fondant. These can range from simple geometric shapes to more intricate designs such as flowers, hearts, or stars. Once the cut-outs are made, they can be carefully placed onto the cake to create a visually appealing decoration.
Embossing
Embossing is another creative way to decorate a cake with fondant. This technique involves using textured rolling pins or embossing mats to imprint patterns and designs onto the surface of the fondant. By rolling the textured tools over the fondant, intricate details can be added, such as lace patterns or swirls. This can add depth and visual interest to the cake’s decoration, creating a stunning finished product.
Molding
Molding fondant allows for even more creative freedom when it comes to decorating cakes. Fondant can be shaped and molded into 3D designs such as flowers, figures, or sculpted shapes. Special silicone molds can also be used to create detailed decorations that would be difficult to achieve by hand. With molding techniques, decorators can truly personalize their cakes with unique and custom-made embellishments.
Using these various decorating techniques with fondant opens up endless possibilities for creativity in cake decorating. Whether it’s utilizing cut-outs for precise shapes, embossing for intricate details, or molding for personalized designs, fondant provides a versatile medium for bringing all kinds of artistic visions to life on a cake’s surface.
Troubleshooting
When working with fondant, it is not uncommon to encounter some issues that may affect the overall look and quality of your cake decorations. One common problem is air bubbles forming under the fondant, creating unsightly bulges on the surface of the cake.
To fix this, simply use a pin or a needle to puncture the bubble and gently press the air out. Smooth the area with your hand or a fondant smoother tool to ensure that it blends seamlessly with the rest of the surface.
Another issue that may arise while working with fondant is cracking. This can happen if the fondant becomes too dry or if it is rolled out too thin.
To prevent cracking, knead a small amount of vegetable shortening into the fondant to add moisture, then re-roll it to smooth out any cracks. Alternatively, you can also use a small paintbrush dipped in water to brush over the cracked area and gently rub it with your finger to blend it back together.
Lastly, if you find that your colored fondant is sticking to your work surface or tools, causing it to lose its shape and texture, lightly dust your work surface with powdered sugar or cornstarch before rolling out the fondant. You can also rub a small amount of vegetable shortening on your hands and tools to prevent sticking while handling colored fondant.
Overall, being prepared for these common issues and knowing how to fix them will help ensure that you achieve professional-looking results when decorating cakes with fondant.
| Issue | Solution |
|---|---|
| Air bubbles forming under fondant | Use a pin or needle to puncture the bubble and press out air |
| Fondant cracking | Knead in vegetable shortening or use water to smooth out cracks |
| Colored fondant sticking | Dust work surface with powdered sugar or cornstarch; Use vegetable shortening on hands and tools |
Finishing Touches
Once the fondant has been successfully applied to the cake and any decorations have been added, it’s time to put on the finishing touches. This is where you can really make your cake stand out and showcase your creativity. Finishing touches can include adding intricate details, texture, or additional decorations to enhance the overall look of the cake.
One popular way to add final touches to a fondant-covered cake is by using edible food coloring pens or paints. These can be used to draw or paint directly onto the fondant, allowing for precision and fine details. This is particularly useful for adding names, dates, or personalized messages to the cake.
Another way to elevate the appearance of a fondant-decorated cake is by incorporating 3D elements. This can include creating small fondant figurines, flowers, or other shapes that are then placed on top of the cake. These extras can really bring a cake design to life and make it truly unique.
Finally, consider adding some shimmer and shine to your fondant decorations with edible glitter or luster dust. These products come in a variety of colors and can be brushed onto the fondant to create a beautiful, eye-catching sparkle. Just be mindful not to overdo it – a little bit of shimmer can go a long way in making your decorated cake pop.
| Finishing Touches Ideas | Description |
|---|---|
| Edible Food Coloring Pens/Paints | Allows for precision drawing/painting on fondant |
| 3D Fondant Decorations | Create unique figurines and shapes to add depth and interest |
| Edible Glitter/Luster Dust | Adds shimmer and shine for an eye-catching finish |
Conclusion and Resources
In conclusion, decorating a cake with fondant can be a fun and creative way to add a unique touch to any special occasion. From preparing the cake and working with fondant to coloring and decorating techniques, there are numerous opportunities to showcase your artistic skills. By following the step-by-step guide and utilizing the tools and materials needed, you can create stunning cakes that will impress your friends and family.
It is important to remember that working with fondant may come with some challenges, but with troubleshooting tips and practice, you can overcome any issues that may arise. Adding final touches and details to the decorated cake will bring everything together for a truly extraordinary finished product. Whether it’s for a birthday, wedding, or other celebration, using fondant for cake decorating opens up endless possibilities for creativity.
For further learning about cake decorating with fondant, there are many additional resources available such as books, online tutorials, and workshops that can help enhance your skills. Don’t be afraid to experiment with different techniques and designs to make each cake unique. With dedication and practice, you’ll soon become an expert at decorating cakes with fondant and delighting everyone with your beautiful creations.

Welcome to my blog about home and family. This blog is a place where I will share my thoughts, ideas, and experiences related to these important topics. I am a stay-at-home mom with two young children. I hope you enjoy reading it! and may find some helpful tips and ideas that will make your home and family life even better!


