Are you wondering how to decorate a number 3 cake for an upcoming birthday or anniversary celebration? Decorating a number 3 cake is not only a fun and creative way to add a personal touch to any special occasion, but it’s also a popular choice for celebrating third birthdays and anniversaries.
In this article, we will explore the significance of a number 3 cake and provide you with the essential tips and techniques for creating a beautifully decorated cake that will impress your guests.
The number 3 holds great significance in various cultures and traditions, representing growth, creativity, and progress. As such, it is often celebrated with enthusiasm and joy.
For parents, decorating a number 3 cake can be an exciting way to commemorate their child’s third birthday, while couples may choose to celebrate their third wedding anniversary with a beautifully decorated cake in the shape of the number 3. Whether it’s for a birthday or an anniversary, a skillfully decorated number 3 cake can serve as the centerpiece of the celebration.
In the following sections of this article, we will guide you through the process of selecting the right type of cake, preparing it for decoration, choosing the necessary tools and supplies, mastering different icing techniques, creating patterns and designs, adding personal touches, and adding finishing touches to complete your masterpiece. With our step-by-step instructions and helpful tips, you’ll be able to create a stunning number 3 cake that will delight your loved ones on their special day.
Selecting the Right Cake
When it comes to decorating a number 3 cake, selecting the right cake is the first and most crucial step. The size, flavor, and type of cake will all contribute to the overall success of the decoration process. Here are some tips for choosing the right cake for decorating a number 3 shape.
Size
The size of the cake will depend on how many people you plan to serve. For a small gathering, an 8-inch round cake may suffice, but for larger parties, a 10-inch or even 12-inch cake might be more suitable. Make sure to consider the number of guests when selecting the size of your number 3 cake.
Flavor
When it comes to flavor, consider the preferences of the person for whom you are making the cake. Classic flavors such as vanilla and chocolate are always safe choices, but you can also get creative with options like red velvet, lemon, or funfetti. If possible, try to choose a flavor that holds up well when carved and decorated.
Type of Cake
The type of cake will also impact how easy or challenging it is to decorate your number 3 shape. A dense pound cake or mud cake may be easier to carve into the desired shape without losing its form. Lighter cakes like chiffon or sponge may require extra care during carving and decorating. Consider the structural integrity of the cake when choosing a type for your number 3 decoration project.
Keep these tips in mind when selecting the right cake for your number 3 decoration project, as they will contribute to a successful and delicious end result.
Decorating Tools and Supplies
Decorating a number 3 cake requires a variety of tools and supplies to achieve a professional and visually appealing result. In addition to the cake itself, some essential tools include offset spatulas for applying icing, piping bags and tips for detailed designs, a turntable for smooth application of frosting, and a sharp knife for shaping the number 3 if necessary.
It is also important to have a selection of food coloring gels or powders to achieve the desired colors for the cake and decorations.
When it comes to icing, choosing the right type is key to achieving the desired finish on the number 3 cake. Buttercream icing is popular for its creamy texture and versatility when it comes to decorating techniques. Fondant can also be used to cover the cake and create detailed shapes and designs. Additionally, edible decorations such as sprinkles, edible glitter, and fondant figurines can add an extra layer of visual appeal to the number 3 cake.
To ensure that you have everything you need for decorating a number 3 cake, it is important to plan ahead and create a comprehensive list of tools and supplies before starting the decoration process. This will help avoid any last-minute runs to the store and ensure that you have everything needed to bring your creative vision for the number 3 cake to life.
Preparing the Cake
Baking and preparing the cake is an essential first step in creating a beautiful number 3 cake. The type of cake you choose will depend on personal preferences or any dietary restrictions. When baking the cake, it is important to use a 3-shaped cake pan to ensure that the final product resembles the number 3.
Alternatively, two round cakes can also be used, which are then cut and shaped into a number 3. Once baked, allow the cake to cool completely before decorating.
To prepare the cake for decorating, start by leveling off the top of each layer if necessary. This can be done using a serrated knife or a cake leveler for more precision. It’s important to have a flat surface for even icing and decorations.
Next, place one layer of the cake onto a serving platter or cake board which provides an even foundation for decorating. To prevent any messes while decorating, consider placing strips of parchment paper under the bottom edges of the cake to keep your serving platter clean.
After preparing your workspace and your tools required for decoration, you can carefully begin with adding a thin layer of frosting between each layer if you are using multiple layers of cake. This process is called crumb coating as it seals in any loose crumbs before applying your final frosting layer. After this step is complete, refrigerate the cake for approximately 15-30 minutes before moving on to adding your final coat of frosting or icing.
| Ingredient | Measurement |
|---|---|
| Cake Flour | 2 cups |
| Baking Powder | 2 tsp |
| Salt | 1/2 tsp |
| Unsalted Butter (softened) | 1 cup |
Icing and Frosting Techniques
When it comes to decorating a number 3 cake, choosing the right icing and frosting technique is crucial for achieving the desired finish. Whether you prefer a smooth and sleek look or a textured and playful design, there are several techniques to consider for decorating your number 3 cake.
Smooth Finish
For those who prefer a polished and professional appearance, using buttercream or ganache for icing the number 3 cake can result in a smooth finish. To achieve this look, start by applying a thin layer of icing as a crumb coat to seal in any loose crumbs. Once set, add another layer of icing and use an offset spatula to smooth it out evenly. For an even smoother finish, consider using a bench scraper to achieve clean edges.
Textured Finish
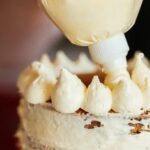
If you want to add some texture and dimension to your number 3 cake, using techniques like piping, ruffles, or rosettes with buttercream can create visually appealing designs. Piping is a versatile method that allows you to create various patterns and shapes on the surface of the cake using different frosting tips. Ruffles and rosettes add a whimsical touch and can be achieved by piping small swirls or frills around the number 3 shape.
Fondant Covering
Another option for decorating your number 3 cake is to cover it with fondant, which provides a smooth canvas for creating intricate designs and decorations. After applying a thin layer of buttercream or ganache as an adhesive, roll out the fondant to the desired thickness before gently draping it over the cake. Smooth out any air bubbles or wrinkles with a fondant smoother for a flawless finish.
By considering these different icing and frosting techniques, you can personalize your number 3 cake based on your preferences and skill level. Whether you opt for a sleek and modern look or embrace texture and creativity, experimenting with these techniques will result in a beautifully decorated number 3 cake that will impress both children celebrating their third birthday and adults commemorating their third anniversary.
Creating Patterns and Designs
When it comes to decorating a number 3 cake, there are numerous creative possibilities for adding patterns, designs, and themes to make the cake truly special. Whether you’re planning a third birthday celebration or commemorating a significant anniversary, customizing the design of the number 3 cake can add a personal touch that will impress your guests.
Here are some ideas and tutorials for creating stunning patterns and designs on your number 3 cake using piping, fondant, and edible decorations:
- Piping Techniques: Piping is a versatile method for creating intricate designs on the surface of the cake. Using different piping tips and colored icing, you can add details such as flowers, swirls, polka dots, or even written messages onto the number 3 shape. Practice with different piping tips and icing consistencies to achieve the desired look for your cake.
- Fondant Decorations: Fondant is a popular choice for creating three-dimensional designs on cakes. You can roll out fondant to create numbers, shapes, flowers, or characters to adorn the top or sides of the number 3 cake. Get creative with different colors of fondant and use molds or cutters to achieve unique designs that suit your theme.
- Edible Decorations: Incorporating edible decorations such as candy pearls, sprinkles, edible glitter, or sugar figurines can elevate the visual appeal of your number 3 cake. Consider using themed decorations that correspond to the occasion or recipient’s interests to enhance the overall design of the cake.
By experimenting with these various decorating techniques and incorporating your own creativity and style into the process, you can achieve a beautifully decorated number 3 cake that is sure to be a highlight of any celebration. The key is to have fun with the decorating process and let your imagination run wild as you bring your vision for the cake design to life.
Adding Personal Touches
When it comes to creating a memorable number 3 cake, adding personal touches can make the celebration even more special. Personalizing the cake with the recipient’s favorite colors, characters, or themes adds a unique and thoughtful element to the decoration. Here are some tips for adding personal touches to a number 3 cake:
- Favorite Colors: Take into consideration the recipient’s favorite colors when selecting the icing and decorations for the cake. Whether it’s a specific shade of blue or a combination of vibrant colors, incorporating their preferences will make the cake extra special.
- Characters: If the person celebrating has a favorite cartoon character, superhero, or animal, consider incorporating them into the design of the cake. This can be done by using edible images, figurines, or hand-piped characters to bring their beloved personalities to life on the cake.
- Themes: For themed parties or events, tailor the decoration of the number 3 cake to fit the overall theme. Whether it’s a princess party, superhero extravaganza, or under-the-sea adventure, coordinating the cake design with the theme adds cohesiveness to the celebration.
By personalizing the number 3 cake with these ideas in mind, you’ll create a one-of-a-kind treat that reflects the recipient’s individual tastes and interests. These thoughtful details will not only enhance the visual appeal of the cake but also demonstrate your thoughtfulness in customizing their special day.
Finishing Touches
After successfully icing and decorating the number 3 cake, the final step is adding finishing touches to make it look polished and complete. Borders are a great way to enhance the edges of the cake and give it a professional look. Using a piping bag with a small round tip, you can create borders using buttercream, royal icing, or even melted chocolate. Simply pipe a continuous line around the top and bottom edges of the cake to frame the design.
In addition to borders, embellishments can be added to further personalize and elevate the appearance of the number 3 cake. Edible flowers, sprinkles, edible pearls, or even edible gold leaf can be strategically placed on the cake to add visual interest and sophistication. When adding embellishments, consider the overall theme and color scheme of the cake to ensure that they complement rather than overwhelm the design.
To make the number 3 cake truly stand out, consider adding small fondant or chocolate decorations that are relevant to the recipient’s interests or hobbies. For example, if it’s for a child’s birthday, small fondant animals or toy figurines can be added as accents around the cake.
For an anniversary celebration, fondant hearts or roses can be used as elegant embellishments. These personalized touches will make the number 3 cake not only visually appealing but meaningful as well.
Conclusion
In conclusion, decorating a number 3 cake can be a fun and creative way to celebrate a third birthday or anniversary. From selecting the right cake and preparing it for decorating to choosing the appropriate tools and adding personal touches, there are several key points to keep in mind when taking on this project. The possibilities for designs and themes are endless, allowing for plenty of room to personalize the cake to suit the recipient’s tastes.
It’s important to remember that practice makes perfect when it comes to decorating a number 3 cake. Don’t be discouraged if your first attempt doesn’t turn out exactly as planned. With patience and determination, you can improve your skills and create stunning number 3 cakes that will impress everyone at the celebration.
So, why not give it a try? Decorating your own number 3 cake can be a rewarding experience, and the joy it brings to the recipient will make all your efforts worthwhile.
Get creative, have fun, and enjoy the process of bringing your vision to life on a delicious and decorative dessert centerpiece. Whether it’s for a special child’s birthday or a milestone anniversary, creating a personalized number 3 cake is sure to make any celebration even more memorable.

Welcome to my blog about home and family. This blog is a place where I will share my thoughts, ideas, and experiences related to these important topics. I am a stay-at-home mom with two young children. I hope you enjoy reading it! and may find some helpful tips and ideas that will make your home and family life even better!


