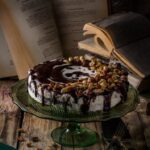
A mummy cake is a fun and spooky dessert perfect for Halloween celebrations. It involves decorating a cake to look like a wrapped mummy, complete with buttercream bandages and eerie decorations. In this article, we will guide you on how to decorate a mummy cake with buttercream, providing step-by-step instructions and tips for achieving the perfect creepy yet delicious treat.
Decorating a mummy cake with buttercream has become a popular choice among bakers due to its versatility and ease of use. Buttercream allows for intricate designs and piping details, making it ideal for creating the wrapped effect of a mummy on the cake surface. By following our guide, you’ll be able to bring this Halloween-themed dessert to life with just a few simple tools and ingredients.
To start your mummy cake creation, you’ll need piping bags, piping tips, an offset spatula, and other essential tools. Additionally, gather ingredients for both the cake base and buttercream decoration. The combination of moist cake layers and creamy buttercream will ensure not only a visually appealing mummy cake but also a delicious one that will be a hit at any spooky gathering. Let’s dive into the process of baking, decorating, and presenting your mummy cake masterpiece.
Tools and Ingredients
To decorate a mummy cake with buttercream, you will need a few essential tools and ingredients to bring your spooky creation to life. When it comes to tools, make sure you have piping bags, piping tips (such as round and leaf tips for different textures), an offset spatula for smoothing buttercream, and a turntable for easy decorating. These tools will help you achieve the intricate details needed to create the mummy wrap effect on your cake.
In terms of ingredients, you will need the usual baking essentials like flour, sugar, eggs, baking powder, vanilla extract, and salt for the cake batter. For the buttercream frosting, gather unsalted butter, powdered sugar (also known as confectioners’ sugar), vanilla extract, and a pinch of salt. It’s important to use unsalted butter so that you can control the amount of salt in your frosting.
When preparing your ingredients and tools, make sure everything is at room temperature before mixing or decorating. This helps ensure a smooth and consistent texture for both your cake batter and buttercream frosting. Once you have everything ready to go, you can move on to baking the moist and delicious cake base for your mummy masterpiece.
Baking the Cake
When it comes to creating a mummy cake, the first and most crucial step is baking a delicious and moist cake as the base. To start, gather all the necessary ingredients for your preferred cake recipe, whether it’s a classic vanilla or a rich chocolate flavor. Preheat your oven to the correct temperature according to the recipe you are using.
Once you have mixed all the ingredients together according to the recipe instructions, pour the batter into prepared cake pans and smooth out the tops. Make sure to tap the pans on the counter a few times to release any air bubbles. Place the pans in the preheated oven and bake until a toothpick inserted into the center comes out clean.
After baking, allow the cakes to cool completely before assembling your mummy cake. It’s important for them to be completely cooled so that they don’t crumble or tear during assembly and decorating. Once cooled, level off any domed tops of the cakes with a serrated knife if needed before moving on to frosting and decorating with buttercream.
| Key Baking Tips | Details |
|---|---|
| Proper Preparation | Ensure all ingredients are at room temperature before mixing. |
| Cake Consistency | Avoid overmixing once dry ingredients are added to prevent a dense cake. |
| Cooling Time | Allow cakes to cool fully in their pans on wire racks for easy removal. |
Buttercream Recipe
Buttercream Recipe for Mummy Cake
To create the perfect buttercream for decorating a mummy cake, you will need the following ingredients: softened unsalted butter, powdered sugar, vanilla extract, and a pinch of salt. Start by creaming the butter in a stand mixer until it becomes smooth and fluffy. Gradually add the powdered sugar, making sure to mix well after each addition. Once all the powdered sugar is incorporated, add in the vanilla extract and salt to enhance the flavor.
Achieving the Right Consistency
One key factor in successfully decorating a mummy cake with buttercream is achieving the right consistency. The buttercream should be thick enough to hold its shape when piped onto the cake but still smooth enough for easy piping. If the buttercream is too thick, add a small amount of milk or cream to thin it out. On the other hand, if it’s too thin, incorporate more powdered sugar until you reach the desired consistency.
Tips for Piping Details
When decorating your mummy cake with buttercream, consider using different piping tips to create texture and dimension on the mummy wraps. A small round tip can be used for outlining and detailing, while larger tips can be used to fill in larger areas quickly. Experiment with different techniques like zig-zag lines or swirls to mimic bandages on a mummy.
Remember to work quickly as buttercream can melt at room temperature, especially if you are piping detailed designs on a warm cake. With these tips and tricks, your mummy cake will surely be a spooky showstopper at any Halloween celebration.
Crumb Coat
Before diving into the intricate details of decorating a mummy cake with buttercream, it is essential to start with a crumb coat. This preliminary step involves applying a thin layer of frosting to seal in any loose crumbs on the cake’s surface, ensuring a smooth finish for the final decorations. To create a crumb coat, simply spread a thin layer of buttercream over the entire cake using an offset spatula, making sure to cover all sides evenly.
Achieving a flawless crumb coat is crucial for the overall appearance of your mummy cake. By sealing in any crumbs and creating a smooth base layer, you set the stage for successful piping and decorating later on. Take your time with this step, as it will serve as the foundation for the rest of your design.
To ensure that your crumb coat sets properly, refrigerate the cake for about 20-30 minutes before moving on to the next steps. This short chilling period will help firm up the buttercream and make it easier to add additional layers without disturbing the base coat. Once your crumb coat is chilled and set, you are ready to start adding the mummy wrap details with buttercream piping in preparation for transforming your cake into a spooky masterpiece.
Decorating the Mummy Cake
When it comes to decorating a mummy cake with buttercream, the process can be both fun and slightly intimidating if you’re new to cake decorating. However, with the right tools and techniques, you can create a spooky yet delicious masterpiece that will impress your friends and family.
To start, you’ll need a baked and cooled cake in the shape of your choice – whether it’s a round cake or a sheet cake. You will also require a batch of freshly made buttercream frosting, preferably in white or off-white color to resemble bandages.
To begin decorating your mummy cake with buttercream, make sure you have piping bags and tips ready to go. For creating the mummy wrap effect, it is best to use a flat piping tip such as a ribbon tip or even a small round tip for tighter lines.
If you want to add details like eyes or other decorations, have small round piping tips on hand as well. An offset spatula will come in handy for applying the crumb coat and creating smooth surfaces on your cake before piping.
Start by applying a crumb coat to your cooled cake – this thin layer of frosting will help seal in any loose crumbs and provide a smooth base for your buttercream decoration. Once the crumb coat has set, you can begin creating the mummy wrap effect using your desired piping tip.
Pipe horizontal lines across the entire surface of the cake, leaving gaps here and there to resemble bandage wraps. Overlap some lines for added effect, and don’t worry about making them perfectly straight – mummies are meant to look disheveled.
Adding Finishing Touches
When it comes to adding finishing touches to your mummy cake, attention to detail is key. After you have created the mummy wrap effect with buttercream piping and added the eyes, there are a few extra steps you can take to make your creation even more spooky and realistic. Here are some tips on how to elevate your mummy cake design:
- Use edible food coloring or paint to create a weathered look on the buttercream “bandages.” This can give the appearance of an ancient mummy that has been preserved for centuries.
- Add shredded coconut tinted with brown food coloring to mimic the look of dusty bandages. Simply sprinkle the coconut over the buttercream wraps for added texture.
- Create a mouth for your mummy by piping a small opening and adding small fondant teeth. This will add a touch of whimsy and character to your cake.
These additional details can take your mummy cake from cute to creepy in no time. Get creative with different decorations and experiment with various techniques to truly make your mummy cake stand out at any Halloween gathering.
Remember, the key to decorating a mummy cake with buttercream is not only in the design but also in the presentation. Consider adding props like fake spiders or tombstones around the base of the cake for an added touch of spookiness. Displaying your masterpiece on a rustic wooden board or atop a black cake stand can also enhance its overall effect.
Ultimately, decorating a mummy cake with buttercream is all about having fun and letting your creativity shine through. So don’t be afraid to try new ideas and techniques when putting together your own deliciously eerie dessert for Halloween.
Storage and Presentation
Creating a spooky and fun mummy cake for Halloween is a delightful way to impress your guests. To achieve the perfect look, mastering the art of decorating with buttercream is essential. By following these steps, you can learn how to decorate a mummy cake with buttercream and create a show-stopping dessert that will be the highlight of any Halloween gathering.
To start off, gather all the necessary tools and ingredients for your mummy cake project. You’ll need piping bags, piping tips in different sizes for various details, an offset spatula for smoothing buttercream, and a turntable to help with decorating. As for ingredients, make sure you have all the items for both the cake base and the buttercream frosting. This will ensure that you have everything on hand when it’s time to start decorating.
When it comes to storage and presentation of your mummy cake, proper care is crucial to maintain its freshness and visual appeal. Store the finished cake in an airtight container or cover it well with plastic wrap to prevent it from drying out.
If possible, refrigerate the cake but allow it to come to room temperature before serving to bring out its flavors. For serving, consider placing the mummy cake on a decorative platter or stand adorned with Halloween-themed decorations for an extra festive touch.
In order to make your mummy cake truly stand out, consider adding some final touches that will enhance its overall appearance. You can sprinkle edible glitter or cocoa powder on top for a dusty effect or use candy eyes for a more expressive look. Get creative with additional decorations such as chocolate spiders or tombstones made from fondant. These small details can elevate your mummy cake design and make it even more captivating for your guests.
Conclusion
In conclusion, decorating a mummy cake with buttercream is a fun and creative way to add some spooky charm to your Halloween celebrations. By following the steps outlined in this guide, you can easily create a delicious and visually appealing dessert that will impress your guests. Whether you’re a baking novice or a seasoned pro, this mummy cake recipe offers a chance to showcase your skills and let your imagination run wild.
Remember, the key to creating a stunning mummy cake lies in attention to detail and patience. With the right tools, ingredients, and techniques, you can achieve a professional-looking result that is sure to be the talk of the party. From piping the perfect mummy wraps to adding eerie eyes and finishing touches, every step plays a crucial role in bringing your mummy cake masterpiece to life.
So go ahead, unleash your creativity and experiment with different designs and decorations for your mummy cake. Whether you opt for a classic mummy look or put your own unique spin on it, the possibilities are endless. Get into the Halloween spirit by trying out this recipe and delighting your friends and family with a spooktacular treat that tastes as good as it looks. Happy decorating.
Frequently Asked Questions
How to Decorate a Mummy Cake?
Decorating a mummy cake can be a fun and creative process. To start, cover your cake with white fondant or buttercream to create the mummy’s bandages. Then, use black icing or fondant to make the mummy’s eyes peeking out. Finally, add some extra details like wrinkles or scars for a more realistic touch.
How Do You Cover a Cake With Buttercream?
Covering a cake with buttercream is a simple yet effective way to achieve a smooth finish. Start by applying a crumb coat of thin layer of buttercream to seal in any crumbs. Then, apply a thicker layer of buttercream evenly on the cake using an offset spatula. Use long strokes to smooth out the surface and achieve a clean look.
How Do You Spread Buttercream on a Cake?
Spreading buttercream on a cake requires some finesse but is relatively easy with practice. Start by placing a dollop of buttercream on top of the cake and using an offset spatula to spread it across the surface evenly.
Work from the center towards the edges, smoothing out any imperfections as you go along. Be patient and gentle to avoid damaging the cake underneath.

Welcome to my blog about home and family. This blog is a place where I will share my thoughts, ideas, and experiences related to these important topics. I am a stay-at-home mom with two young children. I hope you enjoy reading it! and may find some helpful tips and ideas that will make your home and family life even better!


