Are you looking to create a stunning Frozen themed cake for your next special occasion? In this article, we will guide you through the process of decorating a cake that captures the magic of Disney’s beloved Frozen franchise. From gathering supplies to adding the finishing touches, we’ll cover everything you need to know to create a show-stopping dessert that will delight fans of all ages.
The Frozen theme has been a popular choice for birthday parties, baby showers, and other celebrations since the release of the first movie in 2013. With its enchanting visuals and beloved characters, it’s no wonder that many people want to incorporate this magical world into their dessert creations. Whether you’re a beginner or an experienced baker, our step-by-step guide will help you bring the enchantment of Arendelle to life on your own cake.
We’ll start by walking you through the process of gathering supplies for decorating and choosing the right cake flavor and size to complement your theme. Then, we’ll dive into the baking and preparation process before moving on to creating a smooth frosting base and designing the Frozen theme using fondant.
We’ll also discuss how to add character figurines and accessories, as well as provide tips and tricks for adding those final finishing touches that will make your Frozen themed cake truly shine. So let’s get started on making your very own Frozen masterpiece.
Gathering Supplies for Decorating
Before you begin decorating your Frozen themed cake, it’s important to gather all the necessary supplies. You will need a variety of tools and ingredients to bring your vision to life.
Some essential items to have on hand include frosting, food coloring in shades of blue and white, fondant, a rolling pin, piping bags and tips, edible glitter or sprinkles, and character figurines or accessories. Make sure to also have a sturdy cake board and plastic dowels if you plan on making a multi-tiered cake.
Additionally, consider the type of decorations you want to incorporate into your design. Do you want to add edible snowflakes made from royal icing? Or do you envision using shimmering pearl dust to give your cake a glistening icy effect? By gathering all the necessary supplies before starting the decorating process, you can ensure that everything is within reach as you work on bringing the Frozen theme to life.
It’s also important to take into account any specific tools or materials that may be required for the specific techniques you plan to use. For example, if you’re planning on creating intricate details with fondant, make sure you have the appropriate sculpting tools and molds. By being prepared with all the necessary supplies, you can streamline the decorating process and focus on creating a stunning Frozen themed cake.
Choosing the Right Cake Flavor and Size
When it comes to decorating a Frozen themed cake, choosing the right cake flavor and size is an important first step. The flavor of the cake will set the foundation for the entire design, while the size will determine how much space you have to work with when creating your Frozen masterpiece.
Flavor Options
There are several flavor options to consider when choosing a cake for your Frozen themed creation. Some popular choices include vanilla, chocolate, and red velvet. You can also consider incorporating flavors like strawberry or blueberry to tie in with the icy theme of Frozen. Ultimately, the flavor should complement the design and appeal to the taste preferences of the intended recipients.
Size Considerations
The size of the cake will depend on factors such as the number of servings needed, the available space for decoration, and any specific design elements that require a larger canvas. For smaller gatherings, a single-tier cake may suffice, while larger events may call for a multi-tiered masterpiece.
It’s important to consider not only how many people you need to serve but also how much surface area you’ll need for decorating in order to bring your Frozen theme to life.
Personalization
Another factor to consider when choosing the right cake flavor and size is personalization. If you know that the recipient has a favorite flavor, incorporating that into the cake can add an extra special touch.
Additionally, if there are dietary restrictions or allergies to consider, this should be taken into account when selecting both the flavor and size of the cake for your Frozen theme. By focusing on personal preferences and needs, you can ensure that your Frozen themed cake is not only visually stunning but also delightful to eat.
Baking and Preparing the Cake
When it comes to creating a stunning Frozen themed cake, the first step is to ensure that the cake itself is delicious and perfectly baked. Choosing the right flavor and size of the cake is crucial to the success of your design.
Whether you opt for a classic vanilla or chocolate flavor, or perhaps something more unique like blueberry or mint, the flavor should complement the overall Frozen theme. Additionally, consider the size of your cake based on the number of servings needed and the space available for decorating.
Baking Tips
To achieve a moist and flavorful cake, it’s important to follow a trusted recipe and carefully measure out all ingredients. Make sure to preheat your oven to the correct temperature before placing the cake batter inside. To prevent uneven baking, consider using quality cake pans and rotating them halfway through baking. Once baked, allow the cakes to cool completely before attempting to frost or decorate them.
Preparing Your Cake
Before diving into the decorating process, it’s essential to properly prepare your cake for design work. This includes leveling off any uneven tops with a serrated knife or a cake leveler tool. If you are working with multiple layers, apply a thin layer of frosting between each layer to create stability. It’s also helpful to place your assembled cake in the refrigerator for a short time prior to adding additional frosting or fondant decor.
Following these steps will ensure that your Frozen themed cake not only looks beautiful but tastes absolutely delicious as well.
Creating a Smooth Frosting Base
When decorating a Frozen themed cake, creating a smooth frosting base is essential to achieve the desired look for your cake. Here are some steps to achieve a smooth frosting base:
- Prepare the cake: Once the cake is baked and cooled, level the top with a serrated knife to ensure an even surface for frosting.
- Crumb coat: Apply a thin layer of frosting all over the cake to seal in any crumbs. This will create a smooth base for the final layer of frosting.
- Refrigerate: After applying the crumb coat, refrigerate the cake for about 15-20 minutes to allow the frosting to set.
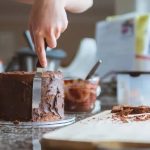
- Final layer: Once the crumb coat is set, apply a final layer of frosting all over the cake. Use an offset spatula to achieve an even and smooth finish.
By following these steps, you can ensure that your Frozen themed cake has a flawless and smooth base for the rest of the decorations.
Remember that creating a smooth frosting base is crucial in achieving professional-looking results for your Frozen themed cake.
Designing the Frozen Theme With Fondant
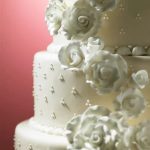
When it comes to creating a Frozen themed cake, using fondant is essential for achieving the iconic icy and magical look. Fondant is a versatile sugar paste that can be rolled out and draped over the cake to create a smooth and flawless finish.
To begin, you will need to choose the colors of fondant that best represent the characters of Elsa, Anna, Olaf, or any other element from the movie. Typically, shades of blue and white are used to capture the wintry essence of Frozen.
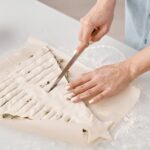
After you have selected your desired fondant colors, you will need to roll them out on a clean surface dusted with powdered sugar or cornstarch. Use a rolling pin to create an even and thin layer before gently draping it onto the frosted cake.
Smooth out any air bubbles and creases with a fondant smoother tool, working from the top down to ensure a seamless appearance. Once the base layer of fondant is in place, you can start adding decorative elements such as snowflakes, icicles, or any other Frozen-themed designs using additional pieces of sculpted fondant.
To make your life easier when working with fondants for your Frozen themed cake decor project consider these steps:
- Start by ensuring that your hands are clean and dry before handling the fondant.
- Keep extra powdered sugar or cornstarch on hand to prevent sticking.
- Utilize small and precise shaping tools like cookie cutters or decorating scissors for intricate details.
By following these tips and tricks for designing with fondant, you can achieve an impressive and visually stunning Frozen themed cake that will delight any fan of the beloved Disney movie.
Adding Character Figurines and Accessories
Once you have created a smooth frosting base and designed the Frozen theme with fondant, the next step in decorating your Frozen themed cake is to add character figurines and accessories. This is where you can really bring your cake to life by incorporating beloved characters from the movie such as Elsa, Anna, Olaf, or Sven.
When adding character figurines, consider the placement and arrangement on the cake. You may want to create a scene from the movie using the figurines, or simply place them strategically around the cake for a balanced look. Accessories such as snowflakes, icicles, or edible glitter can also enhance the overall design and contribute to the Frozen theme.
It’s important to ensure that any figurines and accessories are food-safe and clean before placing them on the cake. You can use toothpicks or small supports to secure larger figurines in place, especially if they are standing upright on the cake.
| Character Figurine | Accessories |
|---|---|
| Elsa figurine | Snowflake decorations |
| Anna figurine | Icicle accents |
| Olaf figurine | Edible glitter |
Finishing Touches and Presentation
When it comes to finishing touches and presentation for a Frozen themed cake, there are several key elements to consider in order to achieve a stunning final result. Here are some essential tips and tricks for making your Frozen themed cake stand out:
- Use edible glitter or shimmer dust to add a sparkling, snow-like effect to the cake. This can be applied to the frosting or fondant decorations for an extra touch of magic.
- Consider incorporating winter-themed elements such as sugar snowflakes, icicles, or edible pearls to enhance the Frozen theme and add visual interest to the design.
- Pay attention to detail when adding the final decorative elements such as piping intricate designs with royal icing, or using food coloring to paint delicate accents onto the cake.
Additionally, the presentation of your Frozen themed cake is important for leaving a lasting impression. Consider displaying the cake on a stand or platter that complements the theme, and add coordinating decorations such as faux snow or winter foliage around the base of the display.
Lastly, don’t forget about capturing the beauty of your creation with professional-looking photos. Taking pictures of your finished cake from various angles in good lighting can truly showcase all the time and effort you put into creating a stunning Frozen themed masterpiece.
Tips and Tricks for a Stunning Frozen Themed Cake Decor
In conclusion, decorating a Frozen themed cake can be a fun and creative project for any occasion. By gathering the right supplies, choosing the perfect cake flavor and size, and following step-by-step instructions to create a smooth frosting base and design with fondant, you can bring the magic of the Frozen theme to life. Adding character figurines and accessories, as well as finishing touches for presentation, will truly make your Frozen themed cake stand out.
Remember to keep in mind some tips and tricks for a stunning Frozen themed cake decor. For example, using edible glitter or shimmer dust can add an extra sparkle to the design, creating a beautiful winter wonderland effect. Additionally, consider incorporating different shades of blue and white to capture the icy atmosphere of Frozen. It’s also important to give yourself enough time for each step of the decorating process to ensure that every detail is perfect.
Overall, whether it’s for a birthday party or a special celebration, a beautifully decorated Frozen themed cake is sure to delight fans of this beloved Disney movie. With creativity and attention to detail, you can create a visually stunning and delicious centerpiece that will be remembered long after the last slice has been enjoyed. So go ahead and let your imagination run wild as you embark on this enchanting baking adventure.
Frequently Asked Questions
Can You Decorate a Frozen Cake?
Decorating a frozen cake is not recommended as the frosting and decorations may not adhere properly to the frozen surface. It’s best to let the cake thaw completely before attempting to decorate it.
Can You Put Fondant on a Frozen Cake?
Putting fondant on a frozen cake is also not advisable as condensation can form on the fondant once the cake starts to thaw, ruining the smooth appearance of the fondant. It’s best to let the cake come to room temperature before applying fondant.
How Long to Defrost a Cake Before Carving?
The time needed to defrost a cake before carving depends on the size and type of cake. Generally, a smaller cake may only take 1-2 hours to defrost at room temperature, while a larger or more dense cake may need 3-4 hours.
It’s important to monitor the defrosting process and ensure that the entire cake is completely thawed before attempting to carve it.

Welcome to my blog about home and family. This blog is a place where I will share my thoughts, ideas, and experiences related to these important topics. I am a stay-at-home mom with two young children. I hope you enjoy reading it! and may find some helpful tips and ideas that will make your home and family life even better!


