Have you ever marveled at beautifully decorated cakes and wondered how they were created? Learning how to decorate a cake step by step can open up a world of creativity and satisfaction. Whether you’re an amateur baker or a seasoned pro, mastering the art of cake decoration can take your baking skills to the next level.
Cake decorating is not only about creating visually stunning treats; it’s also about expressing creativity and adding a personal touch to your baked creations. In this article, we will delve into the essential tools and materials needed for cake decorating, as well as provide step by step guides and tips for creating stunning designs on your cakes.
Mastering the art of cake decoration is a worthwhile skill that can come in handy for various occasions – from birthdays and weddings to holidays and special events. With the right guidance, anyone can learn how to transform a simple cake into an edible work of art. So let’s dive into the exciting world of cake decoration and learn how to create impressive designs with ease.
Essential Tools and Materials
When it comes to cake decorating, having the right tools and materials is essential for achieving professional-looking results. Some of the necessary tools for cake decoration include piping bags, spatulas, offset spatulas, cake turntables, and a variety of decorating tips.
These tools allow for precise application of frosting and create different textures and patterns on the cake. In addition to tools, various materials such as fondant, gum paste, food coloring, and edible decorations are also crucial for adding flair to your cake designs.
One indispensable tool for cake decorators is the piping bag, which allows for intricate designs and precise writing on cakes using different decorating tips. Another essential item is the offset spatula, which is used for spreading frosting smoothly across the surface of the cake.
A cake turntable is also a must-have tool that makes it easier to apply frosting and create seamless designs around the entire cake. Additionally, various sizes and shapes of decorating tips enable decorators to create different decorative effects such as flowers, leaves, borders, and more.
In terms of materials, fondant is a versatile option for creating smooth finishes and intricate details on cakes. Gum paste can be used to make edible decorations such as figurines or flowers that can be placed on top or around the sides of a cake. Food coloring in gel or liquid form allows decorators to customize the color of their frosting or fondant to match their design scheme.
Edible decorations like sugar pearls or sprinkles add texture and extra visual interest to finished cakes. By understanding how to use these tools and materials effectively, aspiring decorators can elevate their skills in cake decoration.
Preparing the Cake
When it comes to cake decorating, the foundation of a beautifully decorated cake is, of course, the cake itself. Preparing a delicious and sturdy cake that can hold up to decorations is essential for successful cake decorating. Whether you’re using a homemade recipe or a store-bought mix, there are certain steps you can take to ensure your cake is perfectly prepared for decorating.
Step by Step Guide on Baking the Perfect Cake
First and foremost, it’s important to follow a reliable and delicious cake recipe. Whether you prefer classic vanilla or rich chocolate, make sure to measure your ingredients precisely and follow each step of the recipe carefully. Be sure to properly preheat your oven and prepare your pans as directed in the recipe.
Once your batter is mixed, pour it evenly into your prepared pans and smooth the tops with a spatula. It’s also helpful to gently tap the pans on the counter to release any air bubbles before placing them in the oven. Follow the recommended baking time and keep an eye on your cakes as they bake.
Tips for Prepping the Cake Before Decorating
After baking, allow your cakes to cool completely before attempting to decorate them. This will prevent any frosting from melting or slipping off due to residual heat. Once cooled, use a long serrated knife to level off the tops of your cakes if necessary. You can also choose to brush away any loose crumbs that may have formed during baking.
To make assembling easier later on, consider wrapping each layer in plastic wrap and chilling them in the fridge until you’re ready to move forward with decorating. Chilled cakes are sturdier and less likely to crumble during assembly. Taking these preparatory measures will set you up for success when it comes time to apply frosting and decorations onto your freshly baked canvas.
Making and Applying the Frosting
Recipe for Making Different Types of Frosting
There are various types of frosting that can be used to decorate a cake, and each type has its own unique flavor and texture. Some popular options include buttercream, cream cheese frosting, Swiss meringue buttercream, and fondant. Each type requires different ingredients and preparation methods.
For example, buttercream is made with butter, powdered sugar, and flavorings such as vanilla extract, while fondant is made from marshmallows or confectioner’s sugar. It’s important to choose the right type of frosting based on the desired taste and look for your cake.
Techniques for Applying the Frosting on the Cake
Once the frosting is prepared, it’s essential to apply it to the cake correctly to achieve a smooth and professional finish. One common technique is known as “crumb coating,” which involves applying a thin layer of frosting to seal in any loose crumbs before adding the final layer of frosting. This helps create a clean and polished look.
Additionally, using an offset spatula or a bench scraper can help in spreading the frosting evenly across the cake’s surface. It’s also essential to practice patience when applying frosting, as rushing through this process can result in an uneven and messy appearance.
Tips for Storing Leftover Frosting
In some cases, there may be leftover frosting after decorating a cake. To prevent waste, leftover frosting can be stored properly for future use. Most frostings can be refrigerated in an airtight container for up to two weeks or frozen for up to three months without significant changes in texture or flavor. When ready to use again, simply let the frosting come back to room temperature and give it a good stir before applying it to another cake or dessert.
By mastering these techniques for making and applying frosting, you’ll be well on your way to creating beautifully decorated cakes that taste as delicious as they look.
Planning the Design
When it comes to decorating a cake, planning the design is a crucial step that can make or break the final result. Here are some tips to help you brainstorm and plan the perfect cake design:
1. Brainstorming: Start by brainstorming different ideas for your cake design. Consider the occasion, theme, and preferences of the person for whom you are making the cake. Whether it’s a birthday, wedding, or any other special event, the design should reflect the purpose and style.
2. Sketching: Once you have a few ideas in mind, sketch out some rough designs to visualize how the cake will look. This will help you determine the layout of your decorations and ensure that everything fits together harmoniously.
3. Visualizing: Use your sketches as a guide to visualize how each element of the design will come together on the finished cake. Think about colors, textures, and proportions to create a cohesive and visually appealing design.
By taking the time to carefully plan and visualize your cake design before decorating, you can ensure that your finished creation looks just as good as you imagined it.
Remember – practice makes perfect. Don’t be afraid to try out new designs and techniques to find what works best for you. Happy decorating.
Creating Decorations
When it comes to decorating a cake, creating edible decorations is an essential skill that can take your cake to the next level. Edible decorations such as flowers, figures, and patterns can add a beautiful and personalized touch to any cake. In this section, we will provide you with step by step instructions for making various types of edible decorations, as well as different techniques for creating them.
One of the most common edible decorations for cakes is fondant. Fondant is a versatile sugar paste that can be molded into various shapes and designs. You can use fondant to create flowers, ribbons, bows, and even 3D figures. To make fondant decorations, you will need a few essential tools such as rolling pins, cutters, and shaping tools. We will walk you through the process of coloring, rolling, cutting, and shaping fondant to create beautiful decorations for your cake.
Another popular edible decoration is royal icing. Royal icing is a type of hard white icing that can be piped into intricate designs such as lace patterns, borders, or even 3D shapes. It’s a great way to add delicate details to your cake. We will provide you with a simple recipe for making royal icing and guide you through the techniques of piping and flooding to create stunning designs on your cake.
In addition to fondant and royal icing, there are many other options for edible decorations such as chocolate ganache, gum paste, marzipan, and more. Each of these materials has its own unique properties and can be used to create different types of decorations. By mastering the art of creating edible decorations, you’ll be able to add a personal and professional touch to your cakes that will impress your friends and family.
| Edible Decoration | Technique |
|---|---|
| Fondant | Coloring, rolling, cutting |
| Royal Icing | Piping and flooding |
| Chocolate Ganache | Molding and shaping |
Assembling and Decorating the Cake
After all the hard work of baking and preparing the frosting, it’s time to assemble and decorate the cake. The first step in this process is to layer and stack the cake.
This can be done by carefully slicing the cake horizontally to create layers, then adding a thin layer of frosting between each one. Once stacked, you can apply a crumb coat of frosting to the entire cake to seal in any loose crumbs before moving on to the final decorations.
When it comes to applying decorations, it’s important to have a plan in mind. Whether you’re using fondant, buttercream, or other edible decorations, having a clear design will help guide your process. Start by arranging any pre-made decorations on the cake before committing to their placement. Once satisfied with their positions, you can begin securing them with additional frosting or edible glue as needed.
One popular trend in cake decorating is creating “naked” cakes, where some of the cake layers are left exposed for a rustic look. This technique involves minimal frosting around the sides of the cake, allowing the layers inside to be visible. This style has gained popularity for its simple yet elegant appearance.
No matter what style of decoration you choose, remember that practice makes perfect. Don’t be afraid to experiment with different techniques and designs until you find what works best for you.
| Step by Step | Details |
|---|---|
| Layering and Stacking | Carefully slice and stack layers of cake with thin layers of frosting in between. |
| Applying Decorations | Have a clear design in mind and secure pre-made decorations with additional frosting or edible glue. |
| Naked Cakes | An overview of creating “naked” cakes for a trendy and rustic look. |
Finishing Touches and Presentation
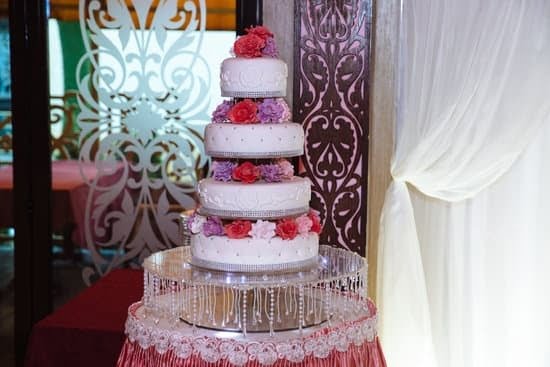
Once the cake has been assembled and decorated, it’s time to add the finishing touches and present the finished product. Adding final touches to a cake can truly elevate its appearance and make it even more appealing. Some tips for adding those finishing touches include using fresh fruits or edible flowers as garnishes, dusting the cake with powdered sugar or cocoa for a decorative effect, or adding a personalized message or greeting with piped frosting.
In addition to final decorative touches, how the cake is presented can also make a big impact. Choosing the right cake stand or platter that complements the design of the cake can enhance its overall presentation. It’s also important to consider factors such as lighting and background when displaying the cake, as these elements can affect how the cake is perceived visually.
When presenting the finished cake, consider creating an attractive backdrop for photographing it if you plan on capturing images of your creation. A clean, uncluttered surface with good natural lighting can help showcase the cake in its best light. Whether for personal enjoyment or professional purposes, a well-presented cake is sure to leave a lasting impression on those who see it.
Troubleshooting and Tips
Cake decorating, like any other skill, requires practice and patience. Even with the step by step guide provided in this article, there may be some issues that arise during the process of decorating a cake. Common issues that decorators face include uneven frosting, decorations not sticking to the cake, or colors bleeding together. However, with a few tips and tricks, these problems can easily be resolved.
One common issue is frosting that is too thin or runny. This can make it difficult to spread evenly on the cake and can result in a messy appearance. To remedy this, try adding more powdered sugar to thicken the frosting or refrigerating it for a short period of time before applying it to the cake. Additionally, ensuring that the cake is completely cooled before frosting can also help prevent the frosting from melting.
Another common problem when decorating cakes is decorations not adhering to the frosting. To avoid this issue, lightly brush the back of the decorations with water or edible glue before placing them on the cake. This will help them stick securely in place.
Color bleeding can also occur when using food coloring or icing on a cake. To prevent colors from blending together, allow one color to dry completely before adding another color next to it. This will help create crisp edges and prevent bleeding.
By being aware of these common troubleshooting issues and employing these simple tips, aspiring cake decorators can hone their skills and achieve professional-looking results in their cake designs. Remember that practice makes perfect when it comes to cake decorating.
Conclusion
In conclusion, learning how to decorate a cake step by step is an essential skill for anyone with a passion for baking and creating beautiful desserts. The process of cake decorating allows individuals to express their creativity and imagination while adding a personal touch to their baked goods.
By following the essential tools and materials, preparing the cake, making and applying frosting, planning the design, creating edible decorations, assembling and decorating the cake, adding finishing touches, and troubleshooting any issues, anyone can achieve stunning results in their cake decoration endeavors.
It is important to remember that practice makes perfect when it comes to cake decorating. While some may find it challenging at first, perseverance and dedication will lead to improvement over time. Additionally, the satisfaction of presenting a beautifully decorated cake that not only looks amazing but also tastes delicious is truly rewarding.
Therefore, I encourage all readers to roll up their sleeves, gather their tools and ingredients, and give cake decorating a try. With patience and determination, success in this culinary art form is within reach for everyone.
Ultimately, as you embark on your journey into the world of cake decorating, do not be afraid to experiment with different designs, techniques, and flavors. Embrace the creative process and allow yourself to have fun with it.
Whether it’s for special occasions or just for the joy of baking something delightful, learning how to decorate a cake step by step will undoubtedly enhance your skills as a baker and bring joy to those who have the pleasure of enjoying your delectable creations.
Frequently Asked Questions
How to Decorate a Cake for Beginners?
Decorating a cake as a beginner can be both fun and challenging. Start by choosing the right tools and materials such as piping bags, tips, spatulas, and food coloring.
Then, practice basic techniques like smoothing icing, piping simple designs, and using different types of frosting. Remember to start with simple designs and gradually work your way up to more complex decorations.
What Are the 3 Tips for Preparing to Decorate a Cake?
First, make sure to level the cake layers before assembling them to ensure a stable base for decorating. Second, create a crumb coat by applying a thin layer of frosting to seal in any loose crumbs before adding the final layer of frosting.
Lastly, plan out your design ahead of time and have all your decorating tools organized and within reach.
What Are the 7 Different Cake Decorating Techniques?
There are several cake decorating techniques that beginners can explore. These include piping techniques like rosettes, swirls, and borders using various piping tips; using fondant to create shapes, flowers or ribbons; creating textured effects using stencils or patterned rollers; using edible paints or airbrushing for creative designs; incorporating edible images or printed wafer paper; piping intricate lace patterns with royal icing; and sculpting with modeling chocolate or gum paste for 3D decorations.
Each technique offers its own unique ways to decorate cakes for different occasions or themes.

Welcome to my blog about home and family. This blog is a place where I will share my thoughts, ideas, and experiences related to these important topics. I am a stay-at-home mom with two young children. I hope you enjoy reading it! and may find some helpful tips and ideas that will make your home and family life even better!


